For those new to off-pavement riding I wanted to post a few thoughts and tips. A little background on my riding. I had dirt bikes in my 20's and early 30's. I started with a DT100 I revived from the dead. A friend gave it to me to junk it and I decided to ride it instead. I moved on to a 1982 XR250, then XR500, then a 1986 XR600. My last dirt bike was a 1989 KTM500MX 2-stroke I sold in 1997. All my riding was in Eastern Washington State which is mostly desert with sand but we also rode in the Eastern Cascade mountains which is proper forest with mud. Fast forward to 2023 when I bought my 2023 Husqvarna 7012 Enduro. This was the first street legal bike I owned, the heaviest and most powerful bike I have owned, and the first bike I had for 26 years.
I am by no means an expert. The best thing to do if you want to ride off-road is to get professional instruction. I am just sharing the tips I have learned off the internet, from riding, and from other experienced riders. For those new to off-road riding I suggest you start with some sand riding tutorials: https://www.youtube.com/results?search_query=sand+riding+techniques. Road riding does little to prepare you for off-road riding. Technique is more important than the bike choice or things like tires and pressures (although those can certainly help).
Street riding does little to prepare you for off-road riding
On the street you have smooth pavement and your tires can handle side loading since they have traction. Many of the techniques you learn riding on the street do not apply off-road since your tires have little traction and cannot handle much side load at all. Off-road riding is rough and violent. You can find smooth gravel which is not too bad but most unmaintained dirt roads here in the desert get torn up by storms. This leaves deep ruts and exposes rocks. Here is an example of a storm damaged desert trail.
The ride is violent enough that the Insta360 X3 camera could not keep it in frame at times. It is also exhausting to ride. You are up on the pegs the whole time to improve control of the bike and to smooth out the shock loads to your body. Your quads get a serious workout as they are basically active suspension. Your wheels get kicked out from under you by loose rocks and ruts. Steering is done more with weighting the pegs and leaning the bike that it is with the handlebars. Slow down too much and the bike goes down. The slower you go the less momentum you have and the required reaction time gets shorter. Speed up too much and the pain and damage of the crash just gets worse.
Too often I have taken newbies out to Mormon Well Road (one of the easier rides around) only to have them turn back and sell their bike. This is after a deep investment in the bike and gear only to find it is just not for them. Often it is people who have ridden on the street for decades and want to try off-road. I am not sure how to advise newbies on this. You just have to try it to see if it is for you. I also have friends who rode street only for decades and took to off-road very well. A good friend of mine went to Colorado and rode the Alpine Loop (and many other passes) with me on a Triumph Scrambler 1200. He has only ridder off-road a few years now and he is about my age. That is no beginner bike for off-road, and the Colorado passes are not beginner trails either. So I don't want to discourage anyone from dirt riding. I just want them to be prepared for what they are getting into.
One of my biggest mistakes here is letting the bike slow down too much. This reduced the momentum which made every rock I hit push the bike around leaving me with little reaction time. This was a mild hill, nothing too steep though. It had loose rocks everywhere. You simply can't avoid all of them. Once I lost momentum, I sat down on the seat in preparation for putting a foot down. This made things even worse since you have less control when setting on the seat. Often it is when you put your foot down you have just committed to dropping the bike.
The fix for this is to go faster and stay up on the pegs. This is counterintuitive as the faster you go the worst the crash will be. However, if you keep the bike over about 15mph, you gain momentum and reaction time. If the bike becomes unstable, ease into the throttle. This removes weight from the front wheel and adds it to the rear. It also increases the gyro effect where the increase rotating mass of the back wheel and engine tend to lock the bike in the upright position.
Loose sand and gravel
Here is an example where I lose momentum on sand in a turn at the end of this clip.
What happened: I slowed down too much for the turn, lost momentum, and dropped the bike. In this scenario by the time I reacted to the bike starting to drop, it was too late to recover. As you slow down you have less time to react and the bike lacks the momentum to stay upright. In soft sand this just won't work.
The fix is to stay on the pegs, weight the outside peg in the corner, lean the bike into the corner, and keep enough speed (momentum). When entering the corner, lean the bike into the corner and weight your outside peg. Some start the turn by briefly weighting the inside peg to lean the bike but by the time you are turning you lean the bike into the corner (you staying more upright) and you put you weight on the outside foot peg. If you start to loose control, throttle out. I tried to throttle out but it was too little too late.
Sand riding has almost nothing to do with traction. It is more like riding a jet ski. Forward momentum is created by a combination of the sand resistance to being displaced (spinning), and the sand being propelled in the opposite direction. In deep soft sand, some bikes will do better starting in second gear with heavy throttle to propel enough sand to move the bike forward. If you try to ease away in first gear, it will just dig down to the frame. Sand paddle tires optimize the thrust but optimizing both the engagement with the sand, and the mass of sand that can be propelled in the opposite direction. Adventure tires are a very poor choice for sand as they do neither very well. Lowing tire pressure can certainly help but tire choice is more important.
Hill climbs
Climbing steep hills, especially on loose terrain, requires momentum to help overcome the loss of traction. Not making the climb means you have the challenging task of turning the bike around on a steep hill. I find it is best to have good momentum by the bottom of the hill and stay on the throttle all the way up. Commit to making it over the top. The engine should be high in the RPM band at the bottom so you have plenty of room to drop rpm if needed. You also want to have plenty of power to make it up the hill.
Obstacles
If your bike has good ground clearance and suspension travel, you can make it over more than you may think. I used to try to avoid more obstacles and now I tend to go over more of them. Here is an example of a storm damaged desert trail with deep cross ruts (deepest around 42min). I throttled though this up on the pegs.
I leveraged the momentum and throttled into it to move the weight off of the front.
Here is another example of a rocky climb with a rut across the trail (4:30).
This one carried a wheelie for a bit after the rut.
Tires and pressures
Tires are all a bunch of trade-offs. The best street tire is useless off-road and the best off-road tire is useless on the street. There is no unicorn that does both great. There are only trade-offs. I prefer the Anakee Wild or TKC80 for the right trade-offs for my riding. They are decent at both pavement and dirt, but optimum at neither. There are better off-road tires, and better street tires, but these tires give a wide range of usability in both.
Lowering tire pressure can smooth out the chop and improve traction off-road. However, it also increases the chance of bent rims, stem tears (for tube tires), bead break flats (for tubeless), and pinch flats. It is also important to air back up for high-speed pavement riding. I used to lower the pressure off-road but I no longer do. To me the incremental improvement is not worth the risk. I hate having to change a tube on the trail. No fun at all. Around Las Vegas we often have embedded rock mixed in with the sand and gravel. Here is a photo from a rim after hitting an embedded rock in sand.
Often the rock is about the same color as gravel and sand so you don't see it coming.
Motorcycle choice
Like tires, the motorcycle itself is a bunch of trade-offs. There is no unicorn. I chose the Husqvarna 701 Enduro since it is decent at both on and off road riding, but it is not the master of either. If you have only one motorcycle (like me) and like mostly riding off-road but ride plenty of pavement as well, I feel this is a good choice. Rider skill is more important than motorcycle choice, but both matter.
The lighter the bike the easier it is to maneuver and pick up when you do drop it. Optimizing for this might land you a 2-stroke dirt bike. This will be great off-road on technical single track and challenging off-road riding. The new electric motorcycles might be even better here. Some of these bikes can be around 225lbs. Most of these bikes are not legal on most roads. Your routes will be restricted to designated off-road areas only. This can be very limiting. These motorcycles also have very small fuel range as the fuel tanks tend to be tiny (often under 2 gallons) often leaving less than 100 mile range. Electric motorcycles generally have significantly less range.
So you want the flexibility of being street licensed but you ride almost exclusively off-road. Now you move to a dual sport. This is basically a dirt bike with speedometer, lights, horn, etc., to make the bike legal. Generally, you are now in a 4-stroke bike. This bike is typically over 250lbs. Still pretty light compared to adventure bikes and now it opens up much more riding. You can make large loops that include some paved sections connecting them. Even many gravel roads require street licensed motorcycles. These motorcycles often come with a bit larger fuel tank, but often have many much larger fuel tanks available aftermarket. Some 5 gallons or more giving closer to 200+ miles of range. Like the smaller bikes, these bikes generally lack cushion drive (rubber damped rear sprocket), better displays, comfort features, and most of the electronic features like traction control and ABS. They also tend to have very narrow uncomfortable seats. They sacrifice comfort and features to save weight.
Maybe you want something more comfortable for longer rides. True adventure riding tends to be much longer rides with a mix of pavement and more mild off-road riding. It is more about the fun of casual riding and seeing the world and less about challenging yourself. Those light dual sport bikes are generally unpleasant on the road. The smaller displacement bikes (300cc or less) also struggle climbing hills at highway speeds, or riding into strong headwinds. Cross winds toss them around more too. The seats are very uncomfortable on long rides. If these things are big negatives for you, it's probably time for an adventure bike. Adventure bikes are generally multi-cylinder. Adding a second cylinder generally adds about 100lbs to the bike. However, it makes the bike much smoother (both engine smoothness and power delivery), the engine sounds much better, and the powerband is wider. This is better for long rides. They tend to start above 650cc and go to around 1300cc. Adventure bikes also have much larger more comfortable seats. They come with larger fuel tanks for longer rides. They can handle more luggage for camping as well. These bikes can make great daily riders too. Many comfort and convenience feature are often on these bikes such as heated grips and cruise control. Weighing in at 450lbs or more, these bikes are a challenge to pick up when you drop them. The stock tires are generally adventure tires which don't work in sand or mud. Larger adventure bikes are great for long, multi-day rides.
I don't agree that we all need 2 bikes. I just prefer to not do the more challenging enduro stuff nor multi-day camping trips. I have an electric mountain bike for the hard enduro stuff. Many I know have 2 or more bikes. I have friends with more than 10 bikes. There is no wrong answer. We each have our own preferences.
The rider
By far rider skill dominates where you can ride well. Chris Birch can ride a KTM1290 or BMW 1300GS where us mere mortals struggle on a dual sport. Put him on a KTM890 and he can tackle challenging single track. For the rest of us, we need a bike that fits both our skill set, and where we desire to ride. The bike choice will absolutely impact where you enjoy riding too. Get an adventure bike and you will prefer proper adventure riding. Since rider skill is the dominant thing impacting your ability to keep the bike upright and enjoy the ride, this is the thing you should focus your effort on improving first.
There are many training classes for adventure riding. While I have never done one of these classes, I would advise those interested in riding off-road to take one. Most who have taken them will say it was totally worth it. Too much off-road riding technique is non-intuitive. If you just try to learn by trial and error, you may reinforce incorrect riding technique. At a minimum, watch some videos on off-road riding technique to at least learn the concepts. Chris Birch has a great page here: https://saynotoslow.nz/ to get started. He is the legend of adventure riding. He offers coaching clinics worldwide. I know people who have attended them and all were very happy. However, there are many others that offer free videos that teach the basic concepts. Here is a YouTube search that will show many options: https://www.youtube.com/results?search_query=sand+riding+techniques. Many others also offer regional clinics that are a great choice for those getting started. You don't have to be Chris Birch to teach those getting started.
Where to ride
You bike choice and rider skill level will heavily impact where you enjoy riding. For instance, I still avoid sand. I can ride sand but I don't enjoy it. Many would agree with me here. If you like a challenge, mastering sand can be fun for some. If you ride around Las Vegas (like a 300+ mile radius) you will encounter sand. There are not many places around here where you can completely avoid sand and loose gravel. The same is true for rock. I created this page with many local trails and YouTube playlists of each of them so you can see what you are getting into: https://sites.google.com/view/las-vegas-dual-sport-adventure.
I found that as I get older I prefer more adventure type riding. The injuries, bike damage, and healing time just take too much of a bite out of the fun. Dork In The Road has a good summary of riding types:
I think he did a great job summarizing this. Maybe there are more dimensions than just 2 but this is a great start. I was maybe a 5 or 6 when I was young. Now I am more of a 3 on his scale. I just don't find pushing it hard in challenging terrain fun anymore. I am no longer a thrill seeker.
My 2023 Husqvarna 701 Enduro has a very crude display. I have no fuel gauge and no good way to tell how much fuel is in the tank. It has a low fuel light and that is it. It has no coolant temperature display, gear indicator (except a neutral light), or RPM display either.
I decided to build an ESP32-based project to fill these gaps. I also wanted to know what ABS mode I was in right after start and not have to wait until after ABS prove-out and wait for the ABS light to indicate state. I know this information is available on CAN (Controller Area Network). This means I could acquire it from CAN without adding any sensors. I only connect 4 wires to the motorcycle, all 4 available at the OBD (On-Board Diagnostics) port. My device reads data from both the engine control and the ABS module. I have not found another device that reads CAN data to calculate fuel consumed and give a virtual fuel gauge, range, and fuel economy like this.
Note: many of these products come in sets or packs. If you were making multiple devices, these sets could cover multiple displays.
Here is the OBD connector on the motorcycle (looking into the face of the plug):
I made the wire harness that T's into the OBD port. The other connector goes to the Veridian cruise control.
Here is the display fitted to the bike. Not a production setup but a location that will work for testing.
Here was some early testing once we (Copilot, Gemini, and I) researched and reverse engineered the data from CAN traffic:
I rode up to Mt Charleston and back, about 44 miles. The estimated fuel economy aligns with my expectation and experience for this ride. I plan to test it between fill-ups and see how close it is. I can use actual measured fuel economy and consumption to compare to its estimate and adjust it as needed to improve accuracy. After this initial test, I implemented a better VE map to improve the fuel consumption estimate.
I was unable to acquire fuel rate directly from CAN so we implemented a basic speed-density model to estimate fuel flow into the engine using data available on CAN. I made a simple reset button for the fuel level. Fill the fuel tank and tap the reset button (top center) to tell the module the tank is full. From there the speed-density model estimates fuel consumed by the engine and subtracts that from the full tank. The fuel remaining indicator (top right) shows the estimated fuel remaining in the tank. The fuel gauge (top left) gives a simple visual indicator of remaining fuel volume. This design uses no moving parts or fuel senders that struggle to survive the harsh off-road motorcycle environment. It also shows fuel quantity, not level (much more useful). Complex tank geometry complicates the meaning of fuel level. This calculates fuel quantity and is completely independent of tank geometry, fuel slosh, and how level the bike is. You simply tell it when you fill it and it measures (estimates) the fuel the engine is consuming to estimate the remaining fuel volume.
Since the Waveshare module is not rugged nor water and dust proof, I bought a waterproof enclosure to mount it in. I modified the enclosure to make it more compact by cutting the back off and gluing flat ABS plastic to the back to make a very shallow enclosure. In order to minimize shock and vibration, the Waveshare sandwiches between foam behind it, and small felt pads between the front and the clear enclosure front. I also mounted the whole assembly to the top of my front bag, which isolates it more from shock and vibration. Once I get this all working well, I should find more robust hardware for a more production ready solution. This is good enough for testing to prove it out though. I can see through the clear enclosure cover OK most of the time but glare is a problem. The location is not great as you have to look too far down to see it. Ideally I would have it mounted above the factory display but I need a better device for that. A rally tower would make that mounting much easier.
I also calculate fuel economy and remaining fuel range similar to modern cars and display that. The image below is from a Windows emulator of the latest UI design. I made several elements bigger for visibility.
The RPM bar changes to yellow at peak HP and red at max engine speed. The gear indicator not only shows neutral, but also shows all 6 gears. The ABS indicator shows ON (default), off-road (in off-road ABS dongle mode), or OFF. The side stand shows up or down. It turns yellow when down, green when up. The CAN indicator defaults to yellow (no CAN data) and turns green when it is reading CAN data. It can also record CAN data to the SD card. We used that CAN data recorder heavily when reverse engineering. This device has a battery-backed real time clock. Clicking the date/time at the bottom opens a dialog for setting it. This is mainly used for data logging to correlate the data to interactions.
Now that I know how to trigger off-road ABS mode, I could easily implement that in this same display. I am thinking of making a feature that has ABS simply follow the traction control setting. If traction control is in off-road mode, set ABS to off-road mode as well (presuming the traction control mode can be read on CAN). This device has Wi-Fi and Bluetooth as well. I could add features that use that such as a BLE broadcast of selected data, data upload when in Wi-Fi, and mobile app integrations.
The next step is to validate the fuel economy and fuel tank quantity estimates by comparing fuel added during a tank fill with the tank size minus the displayed fuel remaining volume. These should be equal (or very close). The fuel economy estimate indicates how accurate the calculated fuel consumed is. Right now I have the inputs to the speed-density model reading 4 times per second and an AI generated engine volumetric efficiency (VE) estimate. I have a VE map created from internet data that represents this engine. Once I get everything working well and validated, then it is time to hunt for better hardware.
After this ride (above) I added 2.225 gallons to the tank to fill it. 3.43 - 2.225 = 1.205 gallons remaining. My display estimated 1.24 gallons remaining giving a difference of about 0.035 gallons (about 1% difference).
I have the software here: https://github.com/jroal/701display. There is a web installer for the ESP32 firmware if you don't want to setup Visual Studio Code.
10/23/2026 update: I added a BLE server to the ESP32 and also created an Android app to be the user interface. The Android app is in internal testing phase (not generally visible yet) and I have tested it. The ESP32 broadcasts BLE data at 20Hz. Any Android device with the app can receive and display this data. Now a device like the Carpuride W702 Plus (or 702S Plus) or HugeRock can be the display. Longer term I would switch to a headless ESP32 like this: https://www.waveshare.com/esp32-s3-rs485-can.htm or this https://www.waveshare.com/esp32-s3-can-2ch.htm?sku=35815 and just use an Android device for the UI.
I have a 2023 Husqvarna 701 Enduro motorcycle. I love this bike. One of the challenges with this design is there are not many options for carrying additional fuel for longer rides. The stock rear-mounted fuel tank carries 3.4 gallons, which gives a range around 160 miles (I average about 50mpg). The low fuel light generally illuminates at around 135 miles ridden. This is adequate range for the vast majority of my rides. Occasionally we want to ride a longer loop that has no fuel stations and I need to carry extra fuel. This is rare, maybe once a year.
I started with a cheap Amazon 1.3 gallon Rotopax copy fuel can. It was under $40, and very poor quality.
The plastic mount broke on the first ride so I reinforced it with through bolts.
There were still several issues. The aluminum plate was cantilevered off the side of the rear luggage rack. When riding in rough terrain the luggage rack would flex. I was concerned with fatigue failure longer term. I attempted to find another anchor point but there is not any point available on is bike. I even considered pannier racks to mount the can but I preferred to not add all that bulk and weight. I also wanted to carry the fuel as low as possible in the bike.
My Husqvarna 701 Enduro just crossed 10,000 miles. I bought it new in the fall of 2023 and ride it most weekends. Here in the Southwest we ride all year. I had to take a couple breaks from riding due to injuries. I really love this bike and it fits my riding desires well. I am between dual sport riding and adventure riding. Maybe a bit more towards adventure riding but not into long pavement rides or camping.
Beyond maintenance and upgrades, here is the list of repairs I had to make:
Radiator. One day it just started leaking in the middle of the core. It was a small leak. No apparent physical damage. The bike had about 9,000 miles on it when this happened in December 2025.
Fuel tank mounts. The top fuel tank bolts loosened and one was completely disengaged. Then one of the lower mount bolts broke. The fuel tank is the rear subframe. There is a subframe reinforcement kit for this but at a minimum check your bolts regularly.
Sidestand sensor. This is a common issue with these bikes. It sits low and it exposed. It was flakey from new, intermittently preventing start and setting DTCs. They replaced it under warranty but the issues persisted but very intermittently. Luckily I bought a sidestand sensor dongle that simulates the sidestand always up solving this problem. If you have one of these bikes this device is a must.
The shifter rubber part disappeared one day so I upgraded to a Tusk all-metal one.
We have some very rocky terrain around here so this bike has taken a beating. Not to mention my questionable riding skills and numerous times I have dropped the bike. The crash bars have some miles on them for sure. My camera has great smoothing making this look much smoother than it is but here is an example of the rough trails.
There are certainly trails with larger rocks that I have ridden but what made this one bad was that it is not really steep and it was straight so the speed was higher and it was long. The beating just never stopped. There are many more great examples on my YouTube channel such as Wheeler Pass North side and Kingston Powerline Road.
The longer I have the bike, the shorter the rear tire life. My original TKC 80 rear tire lasted almost 3,000 miles. Then I switched to Anakee Wild tires, the first rear lasting only 1700 miles. The last Anakee Wild lasted only 1200 miles. I replace them at about 4mm remaining. I now have a nearly worn out TKC 80 with about 1300 miles on it. I have a TKC 80 gen 2 ready for installation soon. The front tires outlast the rears but about 5:1.
I average somewhere in the high 40's for miles-per-gallon. That is a mix of on and off road but mostly off road. I have done as good as low 60's if riding smooth sections where I am in 6th gear often but below 55mph. I have had as low as mid-30's when blasting down the highway with the windshield on into a headwind. I now have a truck to haul the bike so long highway rides are much less common.
Many people go in search of that magic unicorn, either with 2 wheels or 4. In reality, all motorcycles and 4-wheeled vehicles are just different mixes of trade-offs. For a specific person and their desires, there is the right set of trade-offs but they are still trade-offs.
Let's start with 4-wheels. The very things that make a great handling road car, make it absolutely useless off-road. A road car will handle and perform best with a very low center of gravity, stiff suspension and sway bars. Take the extreme example of a Formula One race car. They literally hit the ground at times since they sit so low. This optimizes cornering and downforce through aerodynamics. An F1 car can't even navigate many driveways as it will bottom out.
Now consider the other end of the spectrum, a competition rock crawler 4x4. Aerodynamics is not even a thing here as they don't move very fast. They have no sway bars at all. They require large amounts of ground clearance and suspension travel so they sit very high.
Both of these examples are very focused on the one thing they do really well, and nothing else. In both these cases neither of these vehicles can even attempt what the other can do. Sure, the rock crawler could drive around an F1 track, but at a relatively glacial pace. The vehicles normal people buy generally need to span a wide range of use cases unless you can afford and have the room to store that perfect vehicle for every situation. Even then, you would be making a trade-off every time you took one out. Both of the competition vehicles above must be hauled everywhere they go as they are not legal on any roads. In fact they are only allowed in very specific areas. When it comes to competition, you build a vehicle very focused on that one thing.
We all make trade-offs. If we can only have a single vehicle, and we want to do a wide range of things with it, we will be making major trade-offs. If you enjoy proper off-roading on rugged trails, you will likely get an off-road focused vehicle like a Bronco Raptor or Jeep Rubicon. Both are great off-road, but nowhere near the competition rock crawler in the real technical parts. Both can be driven from your house to the trails, which the rock crawler cannot. Both can be your daily driver as well, but they don't handle very good on the road and they don't get very good fuel economy. While they are not optimum in many cases, it is the right trade-offs for those who enjoy proper off-roading often and also need a daily driver. They have flexibility.
I have 3 vehicles (4-wheeled road vehicles), all with different trade-offs. I enjoy performance driving on road courses so I have a Porsche Cayman S for that. For most of our daily driving we have a Porsche Cayenne. I have a Ford Ranger Fx4 to haul my bikes, and other things. I have a Husqvarna 701 Enduro motorcycle. These are my trade-offs that fit my use cases reasonably well. They are not right or wrong trade-offs, just trade-offs I chose.
The Cayman S rides very low, handles fantastic, and is a blast to drive on pavement. It has very little storage space and only seats 2 people. It cannot tow or haul anything. I can use it to get groceries, as long as I don't have too much to get. I can take it on trips, as long as I pack very light and only want one other person with me. I would avoid even gravel roads in this car and off-road is not an option at all.
The Cayenne has plenty of utility for most of my needs. I can tow with it, and I can get a full grocery run or pack for multiple people on even a long trip. It seats 4 people comfortably, and a 5th in a pinch. It has a modest ride height and firm suspension so it handles very good for an SUV, but these trade-off off-road capability. I might take it on a gravel road, or I could even go light off-roading but I would not take it on anything challenging off-road. These are the right trade-offs in my case and given my other vehicles.
The Ranger handles by far the worst of my vehicles on the road, but also has by far the most off-road capability. It also has the most cargo space, but much of that is in the open bed. I can haul multiple bikes or motorcycles in it.
The same idea applies to motorcycles. If you enjoy a spirited ride on pavement, you get a sport bike like a Ducati Monster. However, this would not be so great on that long road trip where you would chose something like a Harley Road Glide. Neither of those could go off-road at all so you might want a BMW GS. But that BMW is big and heavy for the more technical off-roading where a Husqvarna 701 would be better. But that 701 is also big and heavy for the more challenging off-road trails where you would want a KTM 500. The KTM 500 would be very unpleasant on any long pavement rides. So they are all various trade-offs.
I have the Husqvarna 701 Enduro motorcycle. I like being able to ride to the trails generally and not have to haul it. I prefer off-road riding primarily but most of my routes are a mix of on and off road sections. I thought this was a good video explaining an example of trade-offs and bikes versus riders.
On his scale, I would be in the 3 to 5 range. The older I get and the more crashes I have, the more I slowly shift to the left of his graph. Keep in mind his ranking is just for "adventure" riders. It does not span to road-only bikes or even dual sport bikes.
There are no magic unicorns. A jack of all trades is a master of none. If you get the flexibility of a Husqvarna 701 Enduro, you also made many trade-offs. While it is decent on the highway, not for very long. It can do adventure riding, but with limited luggage, fuel, and comfort. It can do single track, but it is a bit heavy for that. A good rider can even do some more challenging enduro on this bike but I lack the skill and desire for that. Motorcycle riders often customize their bikes to better fit their needs. I have added things like a comfort seat, windshield, and cruise control to move it more towards adventure riding to fit my tastes.
There is not really right and wrong, only trade-offs. For example, the Husqvarna 701 Enduro is not the wrong adventure bike, but it is not as good as a BMW GS for road trips or long rides. It is not the wrong dual sport, but a KTM 500 is better on the more technical trails. Some solve this by having more bikes. Maybe a KTM 500 and a BMW GS. Maybe a 300CC 2-stroke and a Harley road bike as well. Maybe add a trials bike too. All trade-off choices for sure.
Even choices such as tires are trade-offs. I choose DOT knobbies for my 701, such as the TKC 80's that came on the bike. I have also used Anakee Wild tires which are very similar. These are DOT rated tires with a knobby tread. The knobs are larger and closer together than a full dirt tire. This makes them handle better on the pavement, and last a bit longer than dirt tires. They get decent grip both on and off road but not as good on-road as a proper road tire, and not as good off-road as a proper dirt tire. They can do both, but are not the best at either. I need that flexibility for the places I ride.
The same applies to bicycles. I have a full suspension, fat tire, electric mountain bike. I prefer riding almost 100% off-road. Riding pavement is boring to me. I do ride some pavement as most of my routes will include some. I chose to add a 2nd battery to my bike to eliminate range anxiety and not limit my ride length. This combination of full suspension, fat tires, a powerful mid-drive motor, and 2 batteries results in a 90lb bicycle. Many look at this and gasp at how heavy it is. However, it feels like a feature compared to the motorcycle so I am quite comfortable with the weight. I don't like to ride real technical stuff anyway. I much prefer faster flowing trails. I love that I never have range anxiety. I ride as long as I want.
We each have our own desires, skills, perspectives, and wants. We each come to our own conclusions. Sometimes your skills and desires are not a great match so find a better match. In the end we each make our own choice.
I love my Husqvarna 701 Enduro but one thing I wished I had was cruise control. Those times when you are cruising on the highway for over 30 minutes is when I really want it. Your hand just gets tired holding the throttle for long periods, and too often I don't maintain speed well. My mirrors get knocked out of position off-road, generally from hitting branches. I don't notice it until I am cruising down the highway. Adjusting the left side is no big deal but the right mirror requires I take my hand off the throttle and the bike slows down fast. This was not a big enough deal by itself to buy cruise control.
I searched around for a cruise control system and found the Veridian system for my bike (Euro 4 kit). Not only was it a proper cruise control system, but it also supports CAN dongle features. A very important feature it supports is the ability to enter a permanent off-road mode (ABS fully OFF). It maintains this mode through key cycles too. The frustrating and dangerous thing about the stock ABS system is that it always defaults back ON after every key cycle. This can be dangerous off road as ABS does not help at all off-road. In fact, it makes stopping distances much longer. In order to disable ABS after key ON you have to roll forward fast enough for the wheel speeds to qualify, and then the ABS light goes out. Now you have to hold the ABS button for 5 seconds until the light goes back out. At this point you are ready to ride, but only for that key cycle. Shut the key OFF and you have to repeat the process. This Veridian system lets you set off-road mode and have it maintain it through key cycles, until you re-enable it through the Veridian system Perfect!
The install was fairly easy but did take a couple hours. I have so many farkles on my handlebars finding a place for the 3-button control was a challenge. I ended up mounting it to the right mirror mount. I used some hose pieces and tape to make the mounting diameter correct. I may revisit this as the button are a bit far from your grip and it would be better to have it on the other side.
I routed the wire under the key switch cover. I mounted the module behind the left side cover, in front of the airbox. This is where it connects to the throttle wiring too. The module needs to be mounted near the ignition switch, which is where the throttle connectors are as well.
The image above shows the module mounted behind the left side cover near the ignition switch.
The image above shows the view of the connectors from the top with the seat and ignition cover removed. You can see the white connectors.
I routed the OBD connector wiring along the airbox and back to the fuse box area where it connects to the OBD connector, and the rear brake input. Like many of these kits, they have a Scotchlock in the kit to tap the rear brake wire. These are evil little things you never want to use. Instead I used a screw block. I used dielectric grease on the wires to prevent corrosion (see below). This is under the seat where it is semi-protected.
The system works as advertised. Basically just like a typical car cruise control. The image below shows the wiring. The system modifies the throttle command to the engine control. It also connects to the OBD port to get power and data such as engine speed, brake status, wheel speeds, etc., from CAN. This CAN connection is also used for the ABS disable function.
Video showing how to go from normal ABS mode to ABS disabled mode.
This video shows going from ABS disabled mode to normal ABS mode.
Function of ABS add-on
After installation the cruise worked fine. I came home and entered and exited the ABS add-on feature (videos above). The next ride the cruise would not work. When I tried to engage it, the throttle control went away, engine dropped to low idle. After about a second, I was able to control the throttle again with the handle as normal. I contacted Veridian and they suspected that I may have inadvertently entered the throttle calibration mode. Sure enough, I had. Notice the both throttle for each sensor are about the same.
The said to recalibrate the throttle following this procedure:
Here is how do to the throttle calibration.
1. Bike on, Engine off
2. Press Cruise Set 5 times, the controller will flash blue.
3. HOLD the throttle open and press Cruise Cancel.
That fixed the cruise control. Now my calibrations are correct.
8-17-2025 Update
I have now used the ABD add-on more and I really like it. There is still some front ABS but it totally disables rear. I have now ridded several miles on easy to medium terrain and I will be using it from now on. So nice it holds though key cycles.
One interesting note is that the accel and decel work differently than some car cruise control. You can't hold it to continue to accelerate or decelerate. It only recognizes a single press, no matter how long you hold it. As it says in the operators manual, a press of the set/decel means set that speed, or if you already have the cruise engaged, decel by 3mph. The + button (right side in my installation) means resume to last set speed if the cruise was not currently engaged, or increment by 3mph if the cruise is engaged.
Based on this function, I changed how I mounted the switch.
This was the set switch is closest to the throttle, making it easier to set.
Here is a short video showing the cruise control system in use.
That video was shot just before changing the switch orientation.
8-14-2026 Update
I have had trouble switch the ABS mode. After discussing this with Veridian, they said a single CAN message is sent telling the ABS an ABS dongle is present. That invokes the off-road ABS mode from then on. Timing matters. When switching modes, start by the 4 taps on the SET switch followed by a single tap on the cancel switch. Now you must power OFF the bike, wait until it shuts OFF, then power back on for the new mode to take. Depending on timing, it MAY take in the same power cycle but it may not. After switching modes a power cycle is needed to ensure it starts in the mode you selected.
Here is the important part about switching modes. Start by knowing the current mode. Always do this to switch modes:
Key ON
Press the set button (yellow circule below) 4 times, then press the cancel button once.
Key OFF, wait until bike shuts down.
Now start the bike. The ABS dongle mode will be in the new mode.
Since timing is important here, and it is a simple CAN message that must be received by the ABS module, you must turn the key OFF after switching modes, wait until the bike fully shuts down (about 5s), and then start the bike in the new mode. The Veridian system retains the mode you selected between key cycles. It will power up in the last mode you set. While you can change Veridian ABS modes and start the bike without cycling the key, the new mode may or may not take effect depending on mode and timing. For instance, if you switch to ABS dongle mode later in a key system, the Veridian module will make the change but the ABS module may not accept this because too much time has passed from key ON. Your next key cycle will then switch to the new mode.
I post videos to YouTube of my eMTB and dual sport motorcycle rides pretty much every weekend. I posted an article about my setup here: https://jimroal.blogspot.com/2025/01/my-action-camera-setup.html. The Insta360 X3 was a fantastic camera, and now they have come way down in price. I bought mine in 2023 and it has had heavy rough use since then. Earlier this year it stopped connecting via USB, but it would still charge OK. This was minor as I just popped the SD card out to process the video. More recently additional problems cropped up. Every once in a while it seemed to not interact right with the remote. Sometimes I would miss catching video. Then it started dating files wrong. The final straw was the video became jittery and blurry at times on rough terrain (most of my riding). I had been eying the X4 but decided it was not enough of an upgrade. Then the X5 came out while my X3 was having these issues. I was caught at a time of weakness so I bought the X5.
So far I like what I see. As an engineer I expect each generation of a product to take the lessons learned from the prior to make the new one even better and the X5 does not disappoint. The X3 was a great camera but I had a few gripes with it.
The first issue is the exposed lenses were not replaceable. Scratch or break one and the camera is done. So they came out with plastic lens convers. I tried those but they were so easily scratched and they get much dustier so it was unusable for my needs. I finally just removed them. Here is a video where a branch severely damaged the lens cover, ruining the rest of the video. The X4 came with better replaceable lens covers but it was still a lens cover. Finally the X5 has replaceable lenses. Well done!
The sound was fine unless you had any wind. This has long been true for nearly all cameras to be fair. The X3 has small foam mic covers you could stuck on which helped some. I have not tried the X5 in much wind yet but they claim to have many improvements here. On the motorcycle I use an external mic with both foam and fuzzy covers which solves the problem.
5.7k video sounds great but you simply need more for 360. The X4 upgraded to 8k in 360, and the X5 continues this. Honestly I wish it were even higher. If you shoot in 360 and want to create flat video from it, you are stuck with 1080. The X5 can export 4k flat video from the 8k 360 video. This means you can shoot in 360 and still extract a great 4K frame from it. Generally I upload to YouTube in single lens 4k with the X3. Now with the X5 I can shoot in 360 and have the option to create a 4k framed video from it. You can also snapshot a 4k photo from 360 video. The X3 would only take 1080 snapshots from 360.
The X3 did great outdoors but not so much in darker indoor conditions. The X5 made several improvements here with larger sensors and improved shooting modes for low light.
Battery life was a challenge on the X3. They gave the X5 much more run-time, more than double.
The foam case for the X3 did not work well at all. The X5 has a great zipper foam case. I can even leave my ball mount on and it zips up to it, protecting the camera well.
I added the external mic adapter, similar to what I had with the X3. I noticed these say they are not water resistant, and not suitable for high vibration environments. I did have the adapter come off the X3 a few times. Generally after a hard hit, like riding over a rock. I used a small Velcro strap to hold it in on the X3. On the X5 I made a small metal support that uses the 1/4" mount. Insta360 now has a Bluetooth external mic which I may switch to. I have a few hesitations with it though. It seems to have no wind protection and it is not stereo. Wind noise is a huge problem on a motorcycle. The image below shows the external mic covered with foam and then fuzzy wind protection as well. More details about the mic are in this article: https://jimroal.blogspot.com/2025/01/my-action-camera-setup.html .
Here is the first 360 video I shot with the X5. This uses the internal mic which does a surprising good job at eliminating wind noise.
I had the bitrate and sharpness both a medium when I shot that. I usually set those both to high. I use a 512GB SD card so I can fit hours of video. The camera can support cards up to 1TB.
Here are some of the first videos I shot with this camera.
I have recorded several rides now and have experienced issues with the power/mic adapter losing connection. To be fair Insta360 says this adapter is not rated for vibration. I am also concerned with the high vibration and impact on the camera. I added the Insta360 vibration mount.
This goes between the Ram Mount ball and the camera.
I ride off-road in very dusty environments. One problem I have is with all the zippers on my riding gear, backpack, and storage bags on the motorcycle and bike. When they get dusty they are very hard to zip and unzip. They get jammed up with the layer of dust. I blow them out with compressed air and that temporarily makes them less bad but it does not take long riding for them to jam up again.
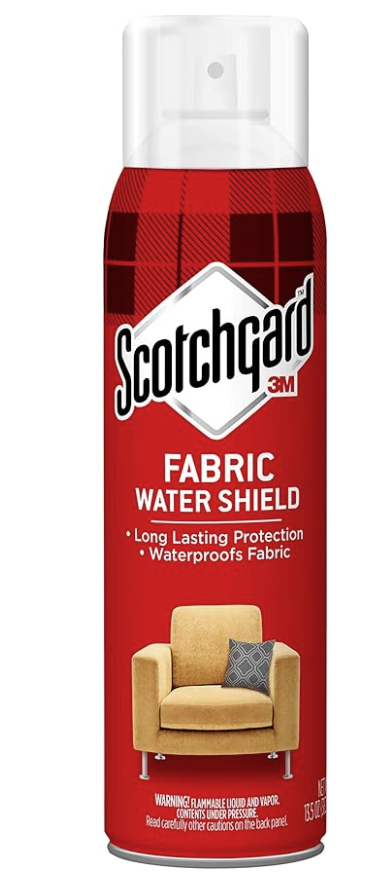
My storage bags on the bike are not waterproof. When I get done riding I rinse the dust off the bike before putting it away. When I do that some moisture gets into the storage bags. I decided it may help to Scotchgard the bags.
It is a simple spray coating that helps repel water. It also happens to be a great non-oil based zipper lubricant which works great in dusty environments. Since I sprayed the outside of the bags, the Scotchgard got into the zippers too. I immediately noticed my zippers were smooth and easy. It was a stark difference. Even better, they stayed that way even after several dusty rides. Many of my zippers I have issues with are plastic. The plastic zippers are much worse for the dust jamming them up. However, this Scotchgard trick seems to nearly eliminate the problem and it even lasts.
After I discovered this, I applied Scotchgard to all the zippers on my gear (riding pants, jacket, etc.), my backpack, and the bags on my bike. What a difference!