Friday, August 24, 2018

Porsche Cayman S Car Stereo Head Unit Upgrade


As I discussed in my Car Stereo Head Unit Wish List post a while back, I wanted to upgrade my stereo to add some features such as navigation and backup camera. I finally did it.  Here is a summary of that installation.

Head Unit Selection

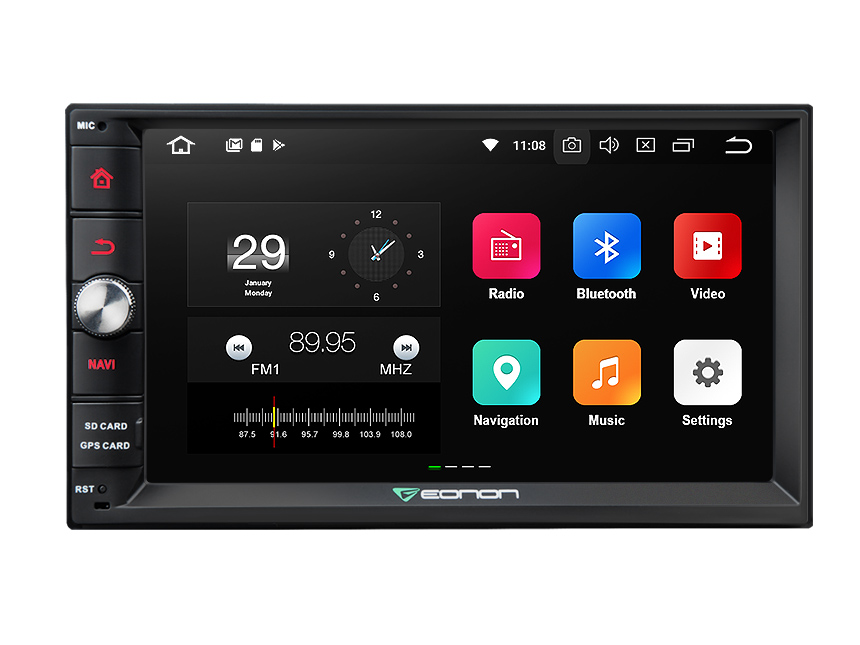
I finally chose the Pumpkin AE0273B-08A. I liked this one because it had:
  • A volume knob (a must have)
  • Android 8.0
  • 4GB RAM (so multiple apps can run smoothly)
  • 32GB internal memory (because apps and app data does best here)
  • Google Play store (so I can install any apps I want like Waze, Google Maps, etc.)
  • Capacitive tough screen (versus resistive or other)
  • Backup camera support
  • External GPS and WiFi antennas (for better GPS accuracy)
The way I will use this when I am on the road is just hotspot my phone and let the unit connect to it via WiFi (for internet) and Bluetooth (for hands free calling).  This way the head unit does all the heavy lifting for navigation,Waze, etc. I can also run Spotify, Amazon Music, Play Music, etc., right in this unit and control it without having to mess with my phone.

I purchased this from Amazon for $299.  However you can also buy it directly from Pumpkin for that same price.  By the time you read this it will likely be even less as things like this often drop fast.  When I first saw this unit it was $349.

Electronics Integration

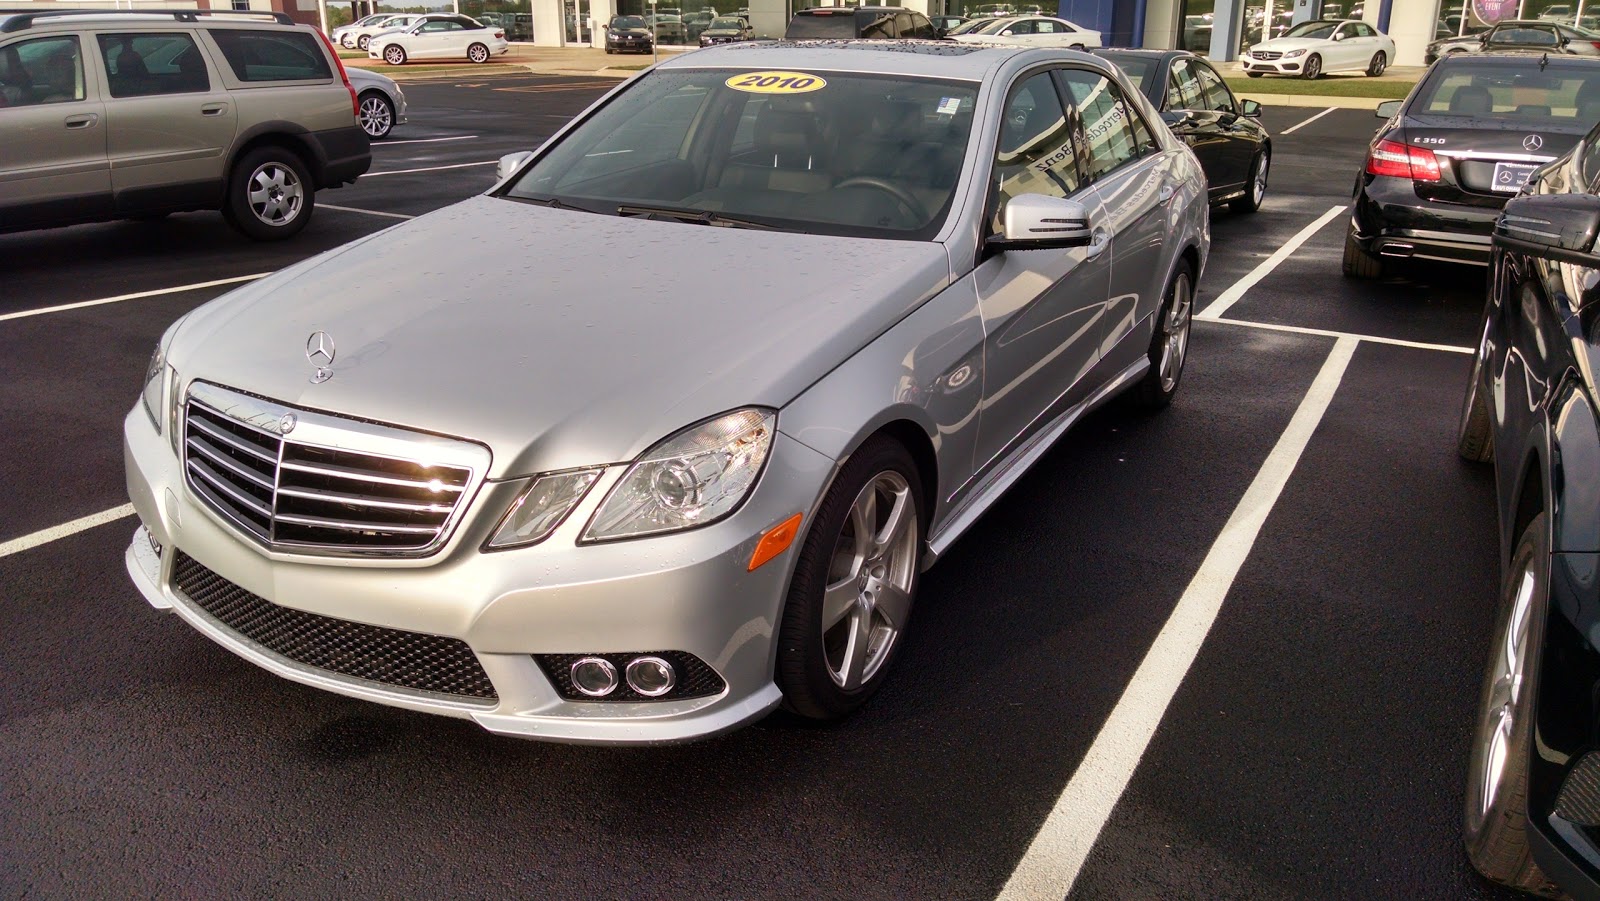
My 2006 Cayman S has the Bose system which makes this upgrade much more complicated and expensive.  The Bose system uses a MOST fiber optic network to communicate between the head unit, CD changer, and amplifier.  The car has a 10 speaker system which uses very low impedance speakers as well. There are several paths you can take when making upgrades to this system but here are the most likely:
  1. Replace pretty much everything. Since the speakers are non-standard you would really need to replace all of them except the sub woofer.  The Sub woofer has its own amp and you can connect a standard low-level output to it with some modification.  Everything else though would need to go.  
  2. Get a MOST gateway to connect into the factory amplifier and retain the amp and speakers. This way you can just replace the head unit and not have to change the rest.
  I chose option 2.  This sounds like the simpler and cheaper way to go until you see the cost of these gateways.  I found some as cheap as $99 and others over $600.  There is another complication: the factory stereo only has battery power and ground.  Pretty much everything else is handled with data link messages over CAN or MOST.  You could work around the CAN stuff by just running wires to the signals you need (key power, park brake, illumination, reverse gear, etc).  I chose a $300 kit that included both the MOST and CAN gateway modules. One of the differences between the lower priced kits and the most expensive ones is the support of fader.  The Axxess kit I chose only has 2 channel (stereo) inputs so you lose the ability to fade front to back.  In the Cayman this is not a big issue as there are only 2 seats and a very small cabin.  In a larger 4-door vehicle you may want to choose differently.

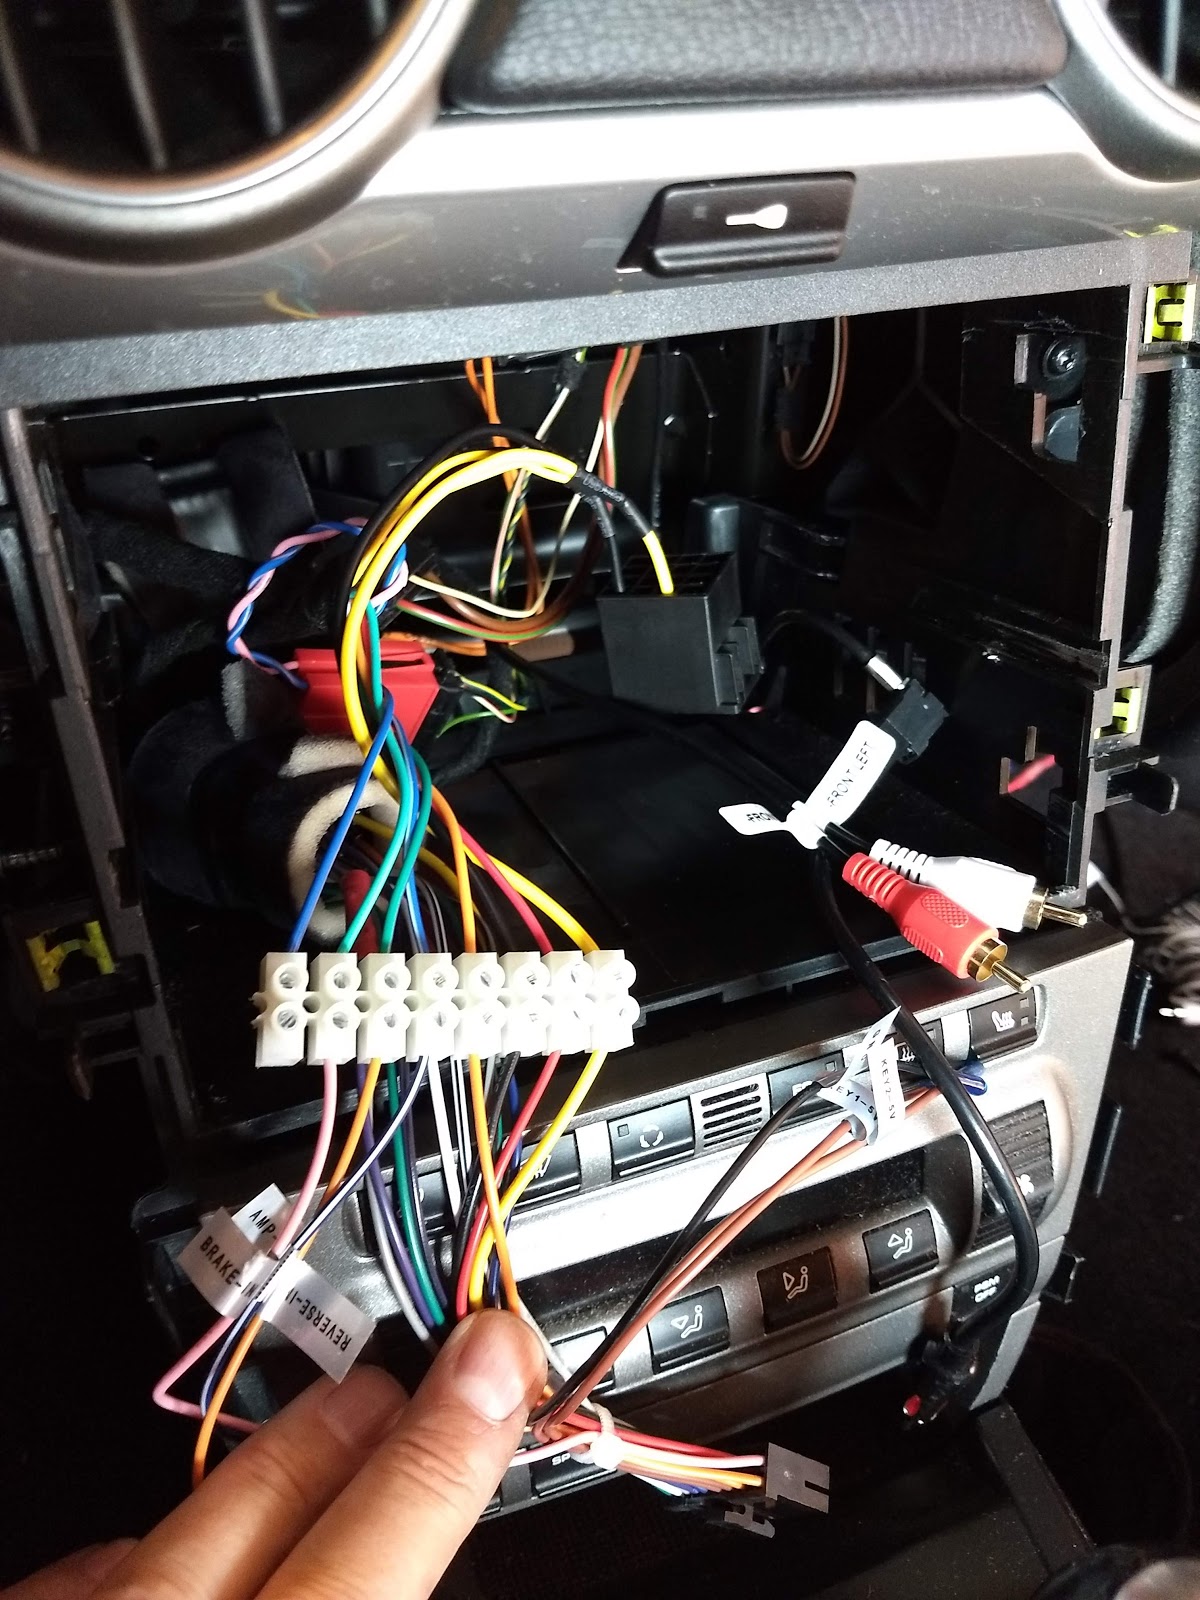
I used a terminal strip to connect the Axxess kit to the Pumpkin wiring as shown in the photos below.

I got the system installed in the car to find that the CAN module (labelled STK760) did not work.  That module is responsible for energizing the key switch input to the system and it was not being energized.  I called Axxess who makes this kit.  They had me measure voltage in the CAN wires.  Both wires were at 2.5V.  They said this means this CAN network is a slow/symmetric network and so the module in the PO904 kit would not work and I needed the PO90052 instead which has a CAN module labelled STK758.  These modules look the same but support the different CAN types.

I received the PO90052 and installed it.  Now the CAN module worked.  The unit would power up and it supplied the park brake and reverse inputs I needed.  Great, except there was still no sound.  The MOST module did not work.  Rats.  I connected my factory stereo to confirm everything else was still working and it was.  I messaged Axxess tech support with my problem.  He had me send a photo of the wire connection at the MOST module.  From that he determined that they had made the wiring incorrectly and that the amp power ON wire (blue/white) needed to be moved over 2 places.
I figured out how to release the terminal and move it over and it worked! Finally. The terminals are released using a small pin from the front (the side that plugs into the module).  I pushed the pin into each side of the terminal carefully bending the retaining tabs in to release the terminal.  Once you get the terminal out, bend the tabs back out so they will catch when the terminal is placed in the correct spot.


One other thing.  The AXXESS adapter did not include the power antenna power wire in the connector for some reason. Since I did not use any of the speaker wires, I just used one of them (green/black) to go into position A5 of the ISO10847 main power connector and wired it to key ON power coming from the AXXESS CAN module.  Without this the radio reception is poor.

These modules don't have mounts so you need to wrap them in foam before placing them in the dash or else they will rattle around. These modules do not produce much heat. I happened to have some Alcantara headliner material from a few weeks ago when I replaced the headliner in this car. It's perfect for this as it has foam and the Alcantara is actually a durable covering.
Fitting all of this into the dash in a way that will not rattle around and where you can also fit the stereo is a challenge. I put the CAN module into a opening on the left (US drivers) side.  I fit snugly and tucked away clear of the head unit.  I put the MOST module directly behind the head unit towards the left.  It's important to not king the MOST fiber optic leads as they sharp bends can cause problems and these can break.  The bulky ISO connectors also need to be wrapped and tucked out of the way of the head unit.  Unfortunately I ended up with 2 ISO connectors: one from the Axxess integration kit that is used for power and ground, and the other from the Pumpkin wiring that has all the speaker level outputs (which I am not currently using).

Installation into dash


Dash Bezel

This was the biggest challenge.  I purchased a American International POR911S kit.  This kit is actually not good.  The plastic side mounts are too thick to fit the Pumpkin head unit.  They have little mounting tabs that won't compress to fit the opening because they hit the stereo.  If you ever did manage to get a head unit installed, removing it again would be a bear.  The only part I used was the dash bezel itself and even that required significant modifications.  The opening was too small to fit the Pumpkin properly so I had to trim it, a bunch. I used a router with a very small bit to carefully trim the opening.
Trimming the bezel with a router

I did the trimming by carefully setting the depth and trimming the back side of the opening.  Then I finished with a file.  I had to trim in many places to make this fit correctly.  I think I spend about 4 hours just on the bezel.
Bezel trimmed and set in place
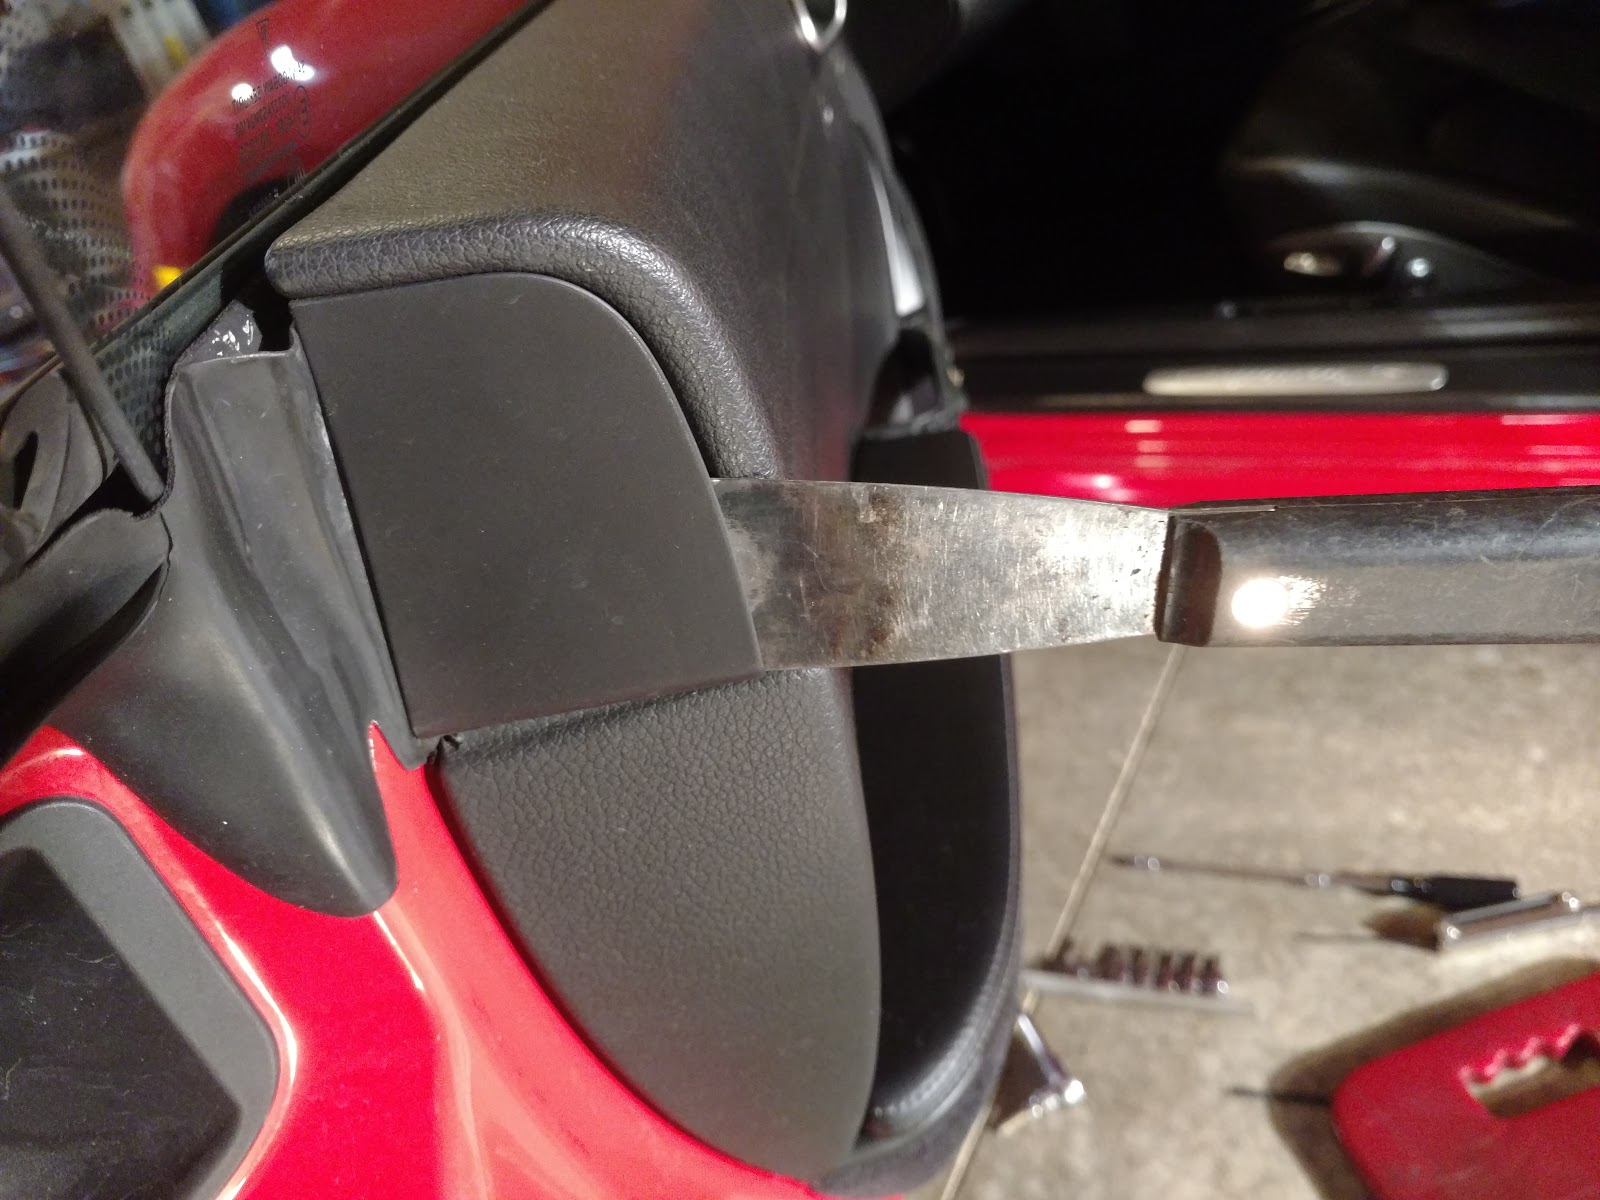
Now I needed a way to retain the bezel.  The bezel kit was set up to have the side mounts also hold the bezel but this will not work in my installation with custom mounts. I needed to make clips that had some spring to them that would fit into the slots in the bezel and behind the side panels that fit on either side of the center console.  These side panels clip and screw in place well so these clips would hold the bezel firmly in place once the side panels were installed.  I bought some 90 degree speed nuts from the hardware store and began modifying them into retention clips.


These will fit in the bezel slots in the sides and then catch behind the center stack trim panels of the Cayman to retain the bezel.  I also attached felt pads like the ones you use on kitchen cabinets to create for constant pressure to hold the bezel tight.


Head Unit Mounts

Now I needed to fabricate mounts for the Pumpkin since the ones in the kit were not going to work.  I started with raw sheet metal from the hardware store.  I used the plastic mounts from the POR911S kit as patterns.  I used a sheet metal cutting blade on the table saw to carefully cut the metal for the mounts.

Significant drilling, bending, and shaping ensued.  I also had to add screws and nut to fit into the slides to hold the back of the head unit.  Of course this made it too thick to fit so I had to grind them down.  I then set the unit in place in the dash with the bezel in place to find the right depth.
I marked it in the image above.  I then removed the mounts and carefully bent this front edge.  This limits how deep the stereo goes into the dash to meet the bezel properly.  I also had to trim the bent edge to eliminate interference with the bezel.  I trimmed the back of the bezel to also allow proper clearance.  Once I got everything to fit, I cleaned, primed, and painted these new mounts so they would not rust. Obviously I was not going for pretty here.
Next I needed to figure out how to actually retain the radio and the bezel.  The factory mount had a set screw on the passengers side.  I noticed the drivers side also had a spot for a set screw so I installed one.  Now I had set screws on both sides.  I set the head unit in place and ran the screws in until they left marks on the mounts.  I then drilled small holes right where these screws contacted so the screw would not lock into the holes.  


Great, now the head unit mounts firmly in place.  I do track days and solid mounts are very important.

Backup Camera

When I first got the Pumpkin I powered it up on the table and set it up, installing the apps I wanted and configuring it.  I connected an old camcorder to it to test the backup camera and video inputs.  The Pumkin did not recognize the signal.  I also noticed that Pumpkin says to use their backup camera to ensure compatibility.  So fine, I bought their camera for $15.  When it showed up I immediately noticed how huge it was.  
I went ahead and mounted this one in the front for a front facing parking camera.  It fit in the pocket under the front license plate.  Since this and the pocket are all black, it blends right in.
The Pumpkin has a video in you can connect this to.  I put a quick link to this video in on the bottom row of the main UI screen.  Tap that button and the camera pops right up.

Then I started searching for a better place to mount this and route the wires.  It was looking very grim.  There is really not a good place on this car for a camera and even if I could find a spot, how would I route the wires?  It was looking like I would have to remove the whole bumper cover or something to route the wires.  The exhaust system spans the whole back of this car so running wires from underneath was not going to work.  Then I found this thread on Planet 9.  I also found a better and much smaller backup camera on Amazon from TOPTIERPRO.  This had a mounting bracket that went behind the license plate instead of in top and the camera was much smaller.

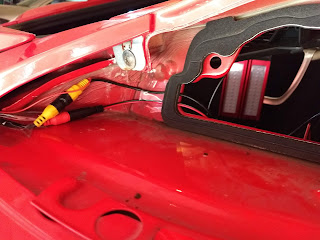
I removed the taillight assembly on the right side and the right side license plate assembly.  Now you can actually see right through from the taillight opening to the license plate light opening.  Nice.
I used a coat hanger, cut it and bent it straight with a hook on the end and pulled the wires right though.  I used a small round file to make a notch in the back inner corner of the license light opening for the wires and snapped the license light back in place.
I connected the camera power and ground wires to the backup light wire and taillight ground as shown below using a terminal block. Note that this connector is inside the car, protected from weather.
I tucked the camera wires under the taillight seal which is a thick foam.  I also taped the wires in place and tapes the connectors which are outside the interior and not fully protected from weather.
It works very well.  This camera has very bright white LED lights to assist the backup lights.

The backup camera function does not require that Android be booted up to work.  When reverse is selected the unit directly feeds the camera to the screen.  
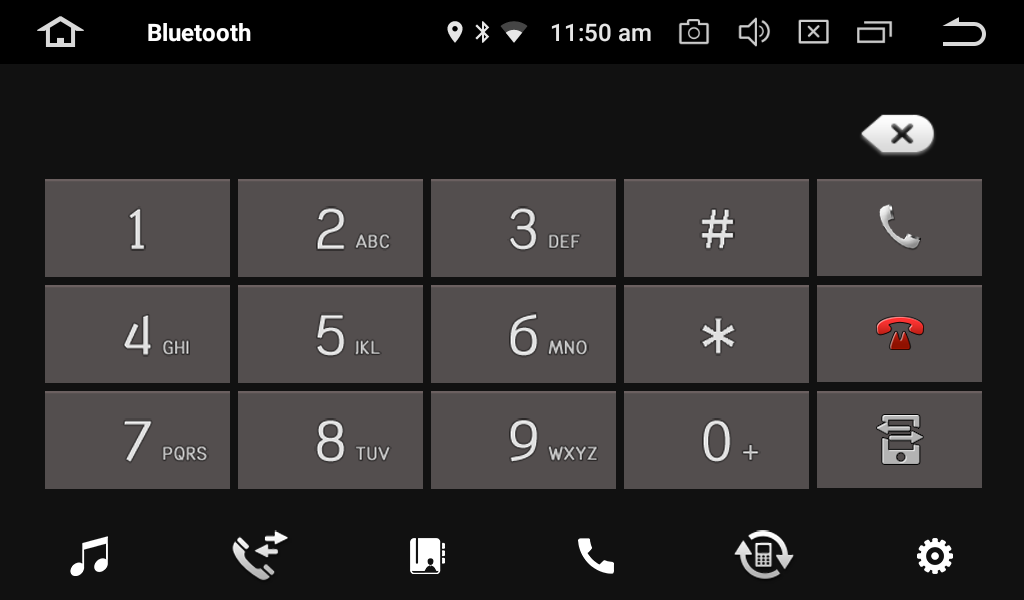
Parts and Tools Needed


Parts List

  • Pumpkin AE0273B-08A Android stereo head unit if found on Amazon.
  • American International POR911S dash kit.
  • Axxess  PO90052 or PO904 head unit replacement kit. There are other options and this is only needed if you plan to retain the Bose amp (and that you have the Bose sound system).
  • Sheet metal stock.  I used 22 gauge steel.  
  • 90 degree angle speed nuts to be modified to retain the bezel.
  • Screw to retain head unit similar to the one on the right side.
  • Small screws and nuts for mounts to slide into opening.
  • Terminal strip to connect Pumpkin wiring to the Axxess integration kit.
  • Primer and paint to paint the fabricated mounts so they don't rust.
  • Antenna adapter for the AM/FM antenna lead. 
  • TOPTIERPRO backup camera if found on Amazon. Others will also work.

Tools List

  • Screwdrivers.
  • Torx drivers.
  • 7mm wrench.
  • wire cutters and strippers.
  • Router with 3/16" straight bit.
  • Table saw with sheet metal cutting blade.
  • Hammers and chisels to make mounts and bezel clips.
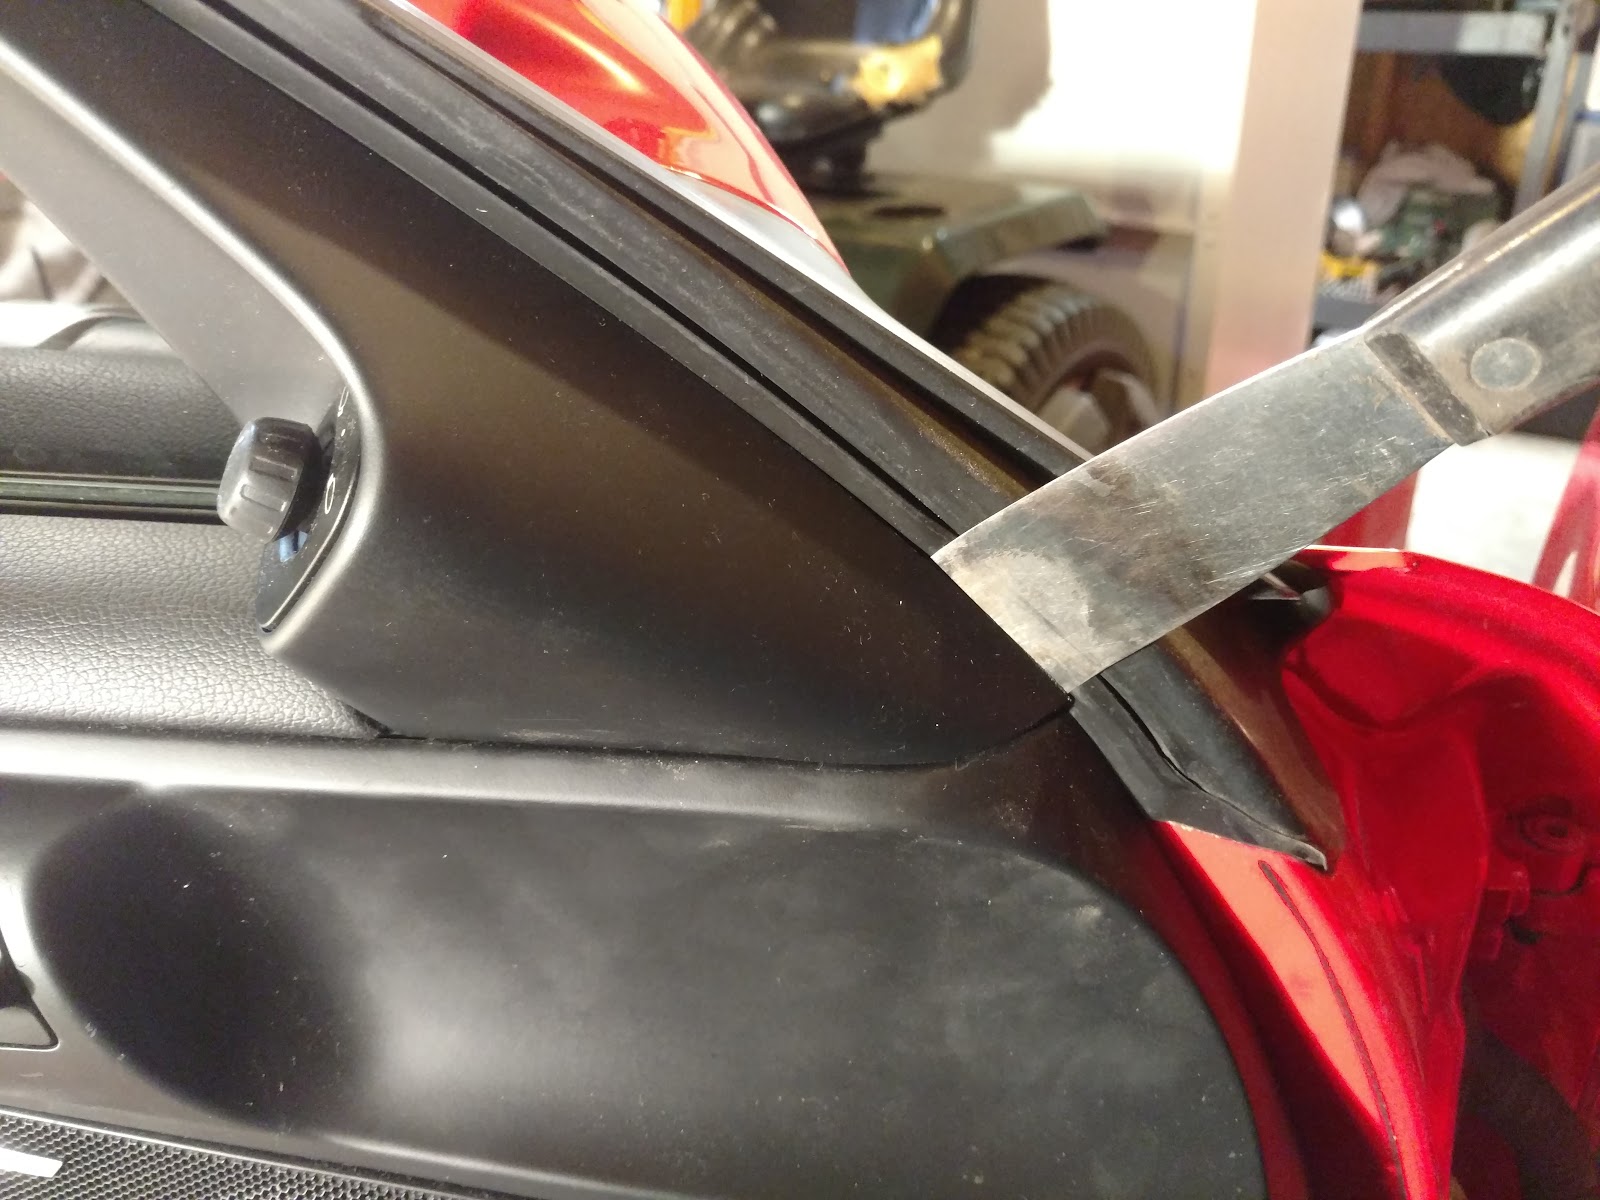
  • Plastic prying tool to remove trim.

Using the System


Sound

At low to mid volume the sound seems very similar to before, as expected.  From about 3/4 volume to max it seems like it may not get quite as loud as before.  It still gets plenty loud for me.  I would guess it is maybe 15% less loud at max.  As I mentioned, I can't fade the sound since the Axxess kit has only 2 channels for input.  

I could easily wire the subwoofer output from the Pumpkin to the Bose subwoofer since this has its own amplifier with line inputs.  This would enable the subwoofer control from the Pumkin so you could adjust the subwoofer level.  I did not bother with this as it seems fine running the subwoofer through the factory Bose system. I doubt this would improve sound quality but it would give the user a bit more control.

9/7/2018 update:  I installed an AXXESS AX-LDBK Universal Line Output Converter Power Converter between the head unit and the MOST adapter.  This gives the ability to add some gain to the line level signal going to the MOST box.  I was able to completely restore the sound level and quality to match the factory head unit. This little $35 unit is well worth it. 
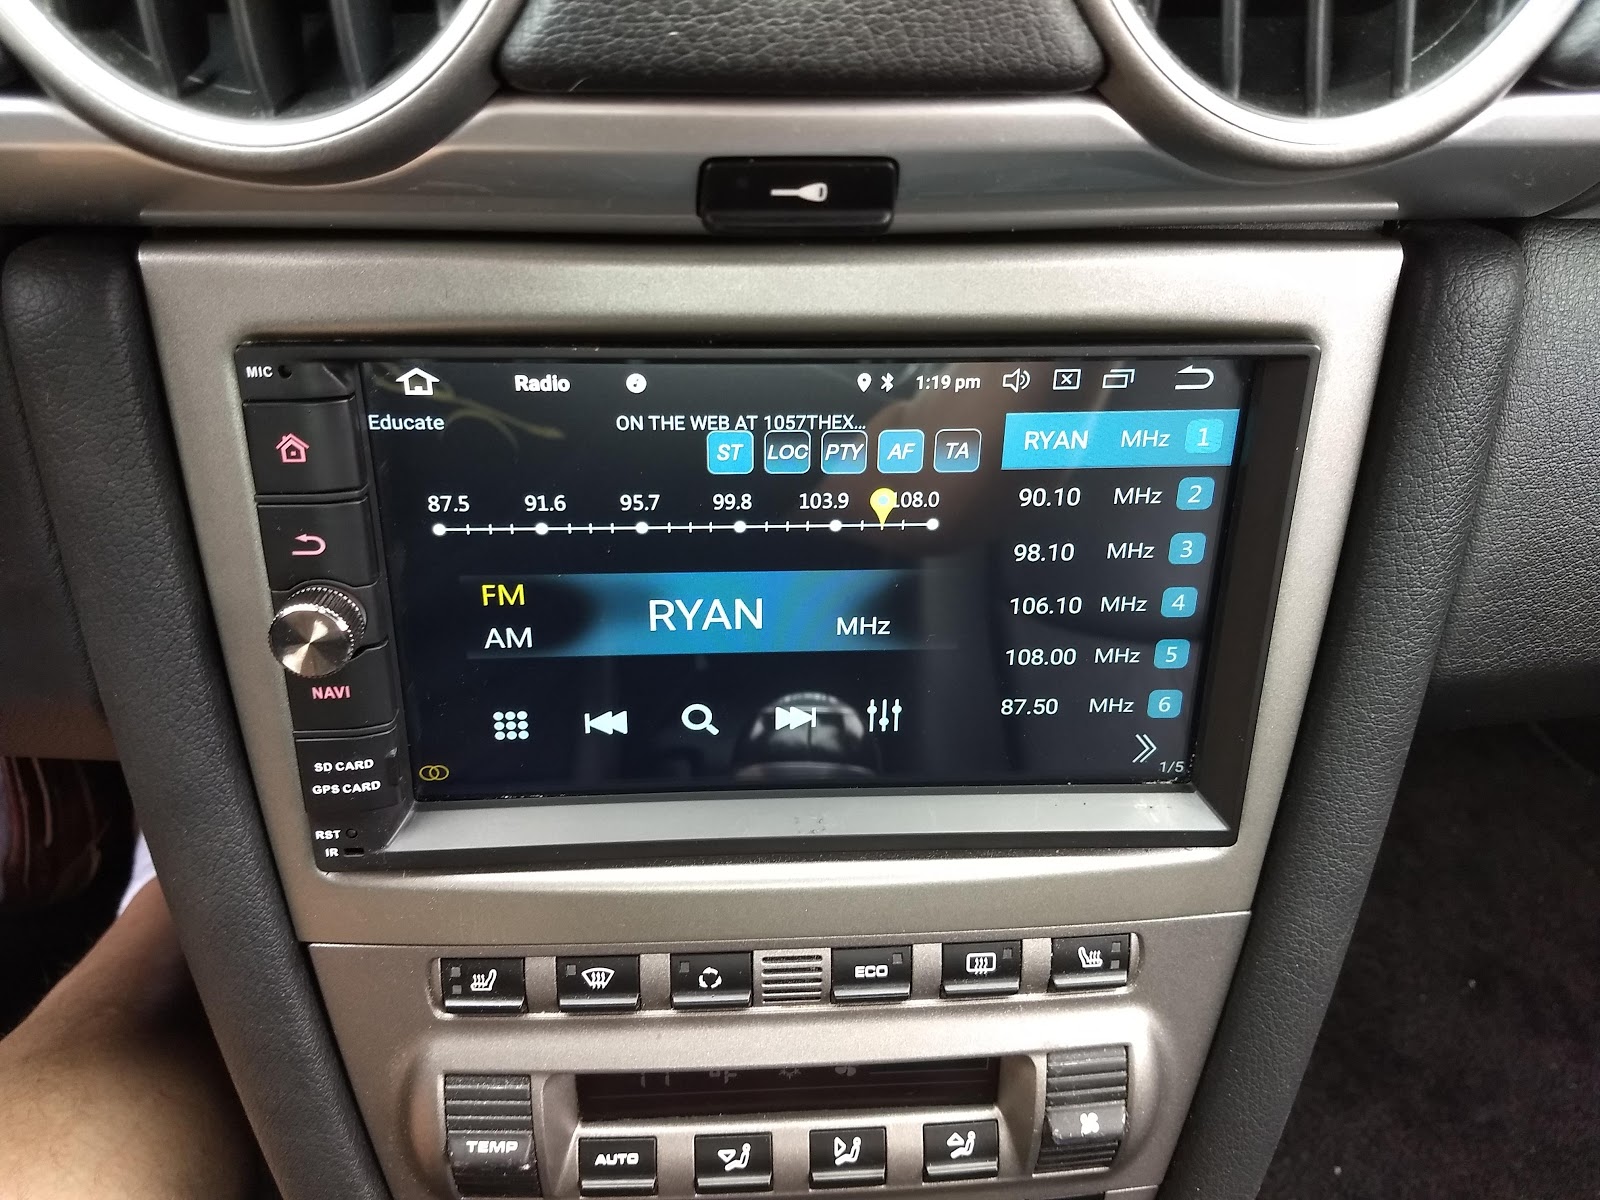

UI

The UI is good.  It seems very responsive.  The launcher they provided seems good too.  This has less system apps than most Android devices and this makes sense.  The use cases for a car stereo head unit are of course different. The apps they provided are simple and functional.  You can of course install different launchers, some focused on car stereos like this.  I have VLC Player installed and it gives a bit better experience for navigating a large music and video library than their apps.  The great thing about having Android in the dash is flexibility.

The screen resolution is 1024x600.  Apps with a light theme, such as Google Maps, look a bit washed out.  Dark theme apps look great.  There is no contrast adjustment in the UI either but it can be done by disassembling the unit.  It has a dash illumination input that will dim the dash a predetermined amount (could not find any adjustment for this) when the dash lights are turned ON.  This can also be used to turn ON the button illumination but you can also configure it to illuminate the button with key power too.

The Android 8.0 OS is very bare bones and focused on being a car stereo head unit.  It reports as a Rockchip PX5 tablet.  It lacks several common Android settings such as developer settings.  You can put it in developer mode but still no developer settings are shown.  It seems the only widgets that work are the ones that are pre-installed.  I installed several apps that generally have widgets yet none are available.  Some apps like Google Contacts will load but when you open them and it asks for an account it will not log in to the same account the connected phone has.  After I tried this though I realized there is not really a use case where I want to use the contact app.  If you go to the Phone app in the Pumpkin it does sync your phone contacts there.  I am not able to get any apps to start at boot.  I have Tasker installed and set up to start at boot but it never does.

Unlike many, I really don't like a touchscreen while driving.  I actually really like the Mercedes Benz Command UI where it has buttons to get to things like radio, navigation, etc., and a center console knob as well as dedicated volume knob, next/last buttons and more.  You can feel and control them without taking your eyes off the road.  This Pumpkin can be controlled with Bluetooth or USB input devices such as a mouse, trackball, or media controllers.  I connected a standard PC USB mouse and it worked fine.  I found many simple Bluetooth media controllers that should also work giving physical buttons for play/pause, previous/next, and more.  There is this thread on XDA Developers though which indicates this may not work. Ideally I would like to make a controller that is similar to the Command control and this should be very doable. Besides USB and Bluetooth, I could also set up dedicated buttons using the steering wheel control inputs.  This can be done with simple switches and resistors and the Pumpkin has a mapping utility in it already.

System

Powering up from completely OFF takes about 15s to 20s.  It has a mode where it suspends instead of completely shutting down and waking from that mode is pretty much instant.  The downside of that instant mode is it will use more of your cars battery.  You can set how long the key is OFF before it fully shuts down.  I found that the Axxess MOST module takes several seconds to power up and start delivering sound anyway, something like 8s.

This unit has 32GB on-board which is more than enough space for all the apps and their main data.  It has 2 micro-SD card slots as well as 2 USB ports.  The documentation says "Support SD card/ USB drive up to 128GB".  I presume this means each can have 128GB?  Not sure but it is more than enough anyway.  I have one 8GB and one 16GB micro-SD cards in it now.  I also had a 64GB USB drive connected.  All worked fine.

I set up my phone as a WiFi hotspot that the Pumpkin connects to for a network connection when driving.  I used Tasker to automate this so that when my phone connects to the Pumpkin for hands-free calling, it also enables the WiFi hotspot on my phone.  When my phone Bluetooth disconnects from the Pumpkin at key OFF the hotspot is returned to its previous state (OFF in my case). 

Tasker profile to see the car connected and turn ON hotspot


It is interesting how focused Android is on battery powered mobile devices.  I guess I didn't think about it much until I got this device.  Unlike phones or tablets, this device has infinite power available (the cars charging system).  Things like battery optimization features are not useful here.  


Final Thoughts

This installation was more difficult than I expected but I would do it again.  I just got it done so I have not used it much yet.  I may add a follow-up in a few months.

I noticed deep in the "factory settings" menu that there are CAN (car data link) settings for many manufacturers including Porsche.  I asked on the Pumpkin support site about this and hope to get some info from them.  


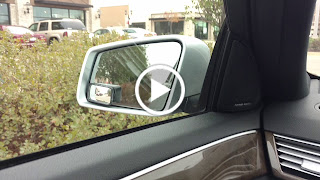
Short demonstration after the installation 
(if the video does not play click "YouTube" to open it in YouTube app or separate browser tab)


Update 9-2020

Using a touch screen in a Porsche sports car on Illinois roads does not work well at all.  Even when bracing your hand with your thumb to try a touch gesture, it is too easy for your finger to slide and the OS think you are giving a slide gesture instead of touch.  I much prefer the knob my Mercedes Command systems have.  My Porsche does not have steering wheel controls.  I decided I would add a few switches to allow for some more controls and depend less on the touch screen.  After looked at many options I settled on a membrane switch in the ash tray (which I never use anyway).  I bought the switch on Amazon for under $10.

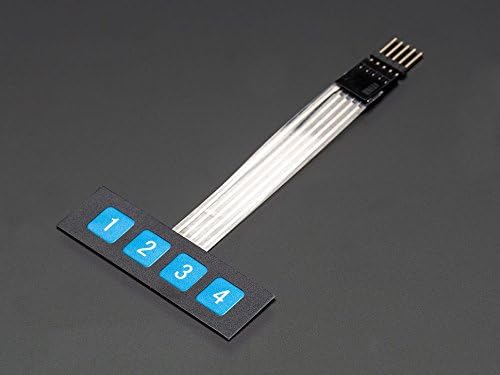
I used a simple terminal strip and 4, 100 Ohm resistors.


The head unit has the key-mapping tool build in.  You just open the tool, press a button, and then select the short and long press responses you want.  

Saturday, July 14, 2018

Car Stereo Head Unit Wish List

Here is my wish list for the ideal car stereo head unit.

  1. A volume knob!  This is by far the best way to control volume.  I like to feel the controls in a car and not have to look at them.  I also like to directly adjust to me desired volume level as quickly as possible.  Driver distraction is a huge problem and touch screens or controls that you must look at contribute to this problem.  
  2. Android or Android Auto.  You can find both.  I would also like the option for the new Android Auto wireless support.    
  3. Backup camera support.  This one is pretty common.
  4. Dask camera support.  This way I could have a much smaller dash camera and be able to view the recordings on the large screen of the head unit and not have to deal with the slow WiFi connection to a phone.
  5. Bluetooth hands free and stereo streaming.  Its amazing how few implement stereo streaming (A2DP).  This should be standard.  It is getting much better now.  A2DP is over 15 years old now and even flip phones had it!
  6. USB-C Power Delivery.  When I am in the car, I often want to charge fast.  Most of the head units have very lame USB ports with very little power.  If I am going to plug in, I want fast power.
  7. Integration with the cars controls.  If the car has steering wheel or other controls I want that all to work with my new head unit.  Most do.
  8. Integration with the cars existing stereo network.  This one I almost never see.  My cars have optical audio networks between the head unit, amps, CD changers, etc.  You can buy very expensive gateways but it would be great if there was an integrated economical alternative.  I want to change the head unit and keep the rest.  Its cheaper to just buy a replacement amp right now.
  9. Remote control knob.  I much prefer a control knob like BMW or Mercedes has to a touch screen.  I would really like this feature on a replacement head unit.  I have never seen this.  Many have a remove control but its more like a TV remote than a control knob for a car.  I would like this to be a hard wired knob too, not requiring batteries or a wireless connection.
  10. Remote GPS receiver.  Sometimes I just want to see where I am on the map and not have to connect to my phone.  You can also get higher quality GPS receivers than what is in the phone.
  11. Track performance app and related sensors.  It would be ideal to have a lap timer, g-force meter, video recorder, etc built in.  Ideally I would like to install Harry's Lap Timer in the unit. 
I finally narrowed it down to an Android powered system.  There are now several available with newer 8-core processors, Android 8, 4GB RAM and 32GB storage.  That should give good performance.  Here are some I found:
  1. Pumpkin: https://www.autopumpkin.com/ 
  2. Eonon: https://www.eonon.com/ (https://www.eonon.com/Android-Car-GPS/2-Din-GPS-Navigation.html
  3. Joying: https://www.joyingauto.com/
There are others.  The nice thing about an Android head unit (over just Android Auto) is that you would only need the phone for an internet connection.  I can just hotspot my phone and let the head unit connect to it.  This fixed item 6 as I would not need to plug the phone into the head unit over USB.  Now I don't need my phone for navigation or music.  All of that can be handled in the head unit.  I can also install both Google Maps and Waze in the head unit and run them from there.  These also support backup cameras and even dash camera function.  Most have 2 SD card slots and multiple USB ports so storage would not be a problem.  

Saturday, January 6, 2018

Moto Z2 Play Review


You may have seen my post last summer as we were starting to shop for cell phone upgrades.  We ended up getting a Moto Z2 Play Verizon edition in August and then a Moto Z2 Play unlocked in December.

Moto Z2 Play Verizon has 32GB storage, 3GB RAM, and Verizon's bloatware.  It retails for $408.  We got it with a special discounted Kate Spade battery mod.  We bought this one in August

Moto Z2 Play unlocked has 64GB storage, 4GB RAM and no bloatware.  It retails for $499 but I got it on sale for $349. We bought this one in December.

Battery Life and Battery Mods

I have read several early reviews of these devices complaining that they shrunk the battery.  Apparently these people have not actually used these devices daily long enough.  Battery life is never a problem.  First of all, these are not really meant to be used without a mod attached.  They feel ridiculously thin and they are slippery without a mod attached.  They also look silly with no mod.  The obvious mod to get is a battery mod.  I bought the basic 2200 mAh battery mod for $37 at Best Buy on sale (regularly $49.99).  With the mod attached the phone feels about the right thickness and the mod has a great grip.  Now the phone has 3,000 mAh internally and with the 2,200 mAh mod you now have a total of 5,200 mAh which is much more than the vast majority of phones out there.  The battery mod features a special efficiency mode which helps use the phones battery in a way that preserves its life.  It uses the phones battery first until it gets to 80% state of charge, then it uses the mod battery to 0%, then switches back to using the phone battery.  At the end of a typical day both batteries are at about 80%.  I have had days where it barely used the mod.  This phone is very efficient with its energy use!  I was shocked how little battery it used even with heavy use.  I just purchased the Moto Turbo Power Pack mod for $79.99 and got a free Insta-Share projector mod free.  This Moto Turbo Power Pack has 3,490 mAh.  That makes the total battery capacity a whopping 6,490 mAh on a phone that is very battery efficient.  I don't think there is a better device for battery life.  Those articles complaining that this phone lost battery life are nuts.  Also, I keep seeing articles complaining that phone manufacturers are too focused on thin and not enough on battery life apparently don't understand this device.  With this Moto Z2 you can have it your way.  Want thin, remove the mod.  Want battery life, you have many to choose from.  You can switch in an instant.  It is the best of both worlds.  Also, you can swap out the mod while the device is powered in a second with no interruption.

There are many battery mods to choose from.  You can get inexpensive ones.  You can get them with wireless charging.  You can get them with Quick Charge.  You can even get designer battery mods such as the Kate Spade mod.  More may come in the future as well.

Other thoughts on battery life

 I did some basic extrapolation based on my battery use.  I estimated I could go over 4 days without plugging in using the 2,200 mAh battery mod.  The 3,490 mAh battery mod would take it to about 6.  This is with my typical use.  

Batteries do degrade over time.  The best way to maintain a phone battery is keep it between 60% and 80% state of charge.  I also suspect that quick charging has a negative impact on the durability of the battery.  The great thing about the Moto Mod battery system is that the mod battery is taking the biggest hit.  You deep cycle it the most meaning it will be the first to degrade.  When this happens you simply by a replacement battery mod and snap it on.  No installation required.

The other thing to consider is how quickly you can charge this up.  The Motor Turbo Power Pack quick charges using Qualcomm Quick Charge 3 or USB-C.  It has its own USB-C port so you can plug it into one charge and the phone into another at the same time.  The combination can charge at 30W.  This means you can get a bunch of added time with only a short charge.  Say you are in an airport between flights and you want another 8 hours of battery, you can quick charge them both and get that in less than 10 minutes.  

Display

I am very happy with this display.  My last phone was a Moto X Pure which was LCD.  Its great being back on AMOLED!  So much crisper.  Colors are deeper.  

Speed

So far this has been very snappy.  We have had the Verizon edition since August with a very heavy user and it is still snappy.

Software

One of the reasons I keep coming back to Motorola is because they use vanilla Android without all the nasty pointless skins and bloatware that others pile on top.  The unlocked Moto Z2 has only a few very useful Motorola features such as Moto Display, Moto Actions, and Moto Voice.  The reviews on Motorola devices often rightfully praise this aspect, as do I.  The Verizon locked Moto Z2 Play does have Verizon bloatware and that is unfortunate.  The very first thing you will want to do with the locked version is replace the launcher.  I use the Google Now Launcher.

Other Mods

Other than batteries the only mod I bought was the Insta-Share Projector.  Well, I actually got it from with the Moto Turbo Power Pack mod which I paid $79.99 for.  That was a great deal as this Insta-Share mod usually costs $299 by itself.  I made a short video about this mod.
When I first saw this mod it seemed like it may have occasional uses but probably not worth the price.  It is actually pretty neat.  I could see many uses for someone wanting to present to a small group.  It is much thinner than I had expected.  When you attach it to the phone, you can still slip you phone into your pocket fine.  It is less bulky than I would have expected.  In that video I am projecting about 75" diagonal I would guess.  I have the room lights dim, as you normally would for a projector.  It does chew up its battery fairly fast but you can plug it in for longer presentations or movies.  

I have seen too many reviews of the Moto Z phones that almost make fun of the mods, and ignore them being an integral part of this phone product line.  The Moto Z is not meant to be used without a mod attached in my opinion.  Any review that complains about the slippery back or exposed connector just don't get this product line at all.  In my opinion all the reviews should have included at least a basic battery mod since this is likely how nearly all users will actually use this device.  With a 2,200 mAh battery mod attached, this phone feels about right as far as thickness and grip.  It does make it a bit heavier than most but then again its packing some serious battery power too.  Personally I like the weight as it feels quality and I can easily tell its in my pocket so I don't leave it places on accident. 

Update 3/2019: This thing is still working great.  Battery life seems the same as new.  I don't have to think about charging.  I am in the habit of charging each night and I never need to charge any other time.  The phone is still snappy and glitch free.  

Comparison to Moto X Pure

Both of these phones replaced Moto X Pure.  By 18 months the Moto X Pure had terrible battery life and it became very laggy at times.  Even after 12 month there was a noticeable performance loss and battery life loss.  We could not make it past lunch time without charging.  Those devices had a Snapdragon 808 processor and the Moto Z2 Play has a 625.  It seems like there are huge battery efficiency gains in the 625 versus the 808.  The phone performs far better too.  The software and OS are also upgraded on the Moto Z2 Play.  I waited forever to get Android 7 on my Pure.  I finally just side-loaded it one day but it did not perform better.  

Tuesday, December 26, 2017

2006 Porsche Cayman S 80k mile review


I bought this Cayman S in 2014 and wrote an article about the buying experience and first impressions.  Recently this car hit 80k miles (actually just under but close enough) so I would I would write a review of what it has been like since I bought it.  This is my second Porsche.  The first was a 1987 944S.  This car is a huge upgrade in every way.  This is the best car I have owned, especially from a driver engagement perspective.  When you first get in you already know you are in a very special car.  Often when I am at the gas station filling up I get compliments on the car.  When you start up the flat 6 in the morning it rumbles for a bit as the catalyst warm-up strategy makes for a lopey idle that sounds great.  I have done just a couple minor modifications, 2 of which improved the engine sound.  The first was to replace the restrictive exhaust outlet.  The second was removing the baffles from the air box and installing a K&N filter.  Now you can really hear the sweet induction sound which is hard to describe with words.  I drive the car daily as long as there is no salt on the roads (which takes out most of the winter).  I also give it proper exercise by doing a few track days each year.  On the street you find that you don't even need to brake where you would with mortal cars.  The cars ability to effortlessly change directions is pure magic.

The Good

Pretty much everything!  
  • World class leading handling.  Confidence inspiring.  I can't properly describe the feel of this car in words.  You must drive one to understand (not recommended unless you are ready to buy one).  It feels more like a streetable race car then a raceable street car.  
  • Awesome looks.  You can see both form and function in this design.
  • Mid-engine behind driver design.  Did I mention how well this handles!
  • Great engine.  Sound is amazing and power is also good.  Sure, I could always make use of more power but I don't find myself pining away for it.  As you hold the throttle open you can hear the cams phase and open up the flow.  When you upshift at redline you get this incredible wail that reminds me of the F1 cars in the V8 days.  
  • Comfortable seats.  I have the standard seats (versus the sport) and even these are great.  Its easy to get in and out yet they still hold you well at the track.  
  • Practical spaces to carry stuff.  With 2 trunks you actually have good space to carry stuff for a sports car.  
  • Excellent dash and gauges.  All the info you need at a glance.  The analog speedo is a bit less useful but the tach and display are perfect.  
  • Great interior.
  • The ride is spot on.  A bit firm on rough roads and it could use a bit more firmness on the track but this is a great middle ground.  Its firm but not jarring on rough Midwest roads yet still great at the track.  I don't have the active shocks (PASM) and that would likely improve this even more at the track.
  • General ergonomics.  Everything is where it belongs and is intuitive to use.  
  • Very simple to change brake pads.  With fixed calipers you just pull a pin and the pads come right out.  This is more important when you tack it as you change pads often.  
  • I can comfortably fit with a helmet on.
  • The seats go low enough.  In most cars it feels like you sit far too high.  This one lets you lower the seat down where it should be.
  • Great automatic HVAC.  Automatic HVAC systems are not created equal.  This one however works very well.  I set it and forget it.  
  • Sport Chrono sport mode.  My car has the Sport Chrono system.  While I don't really use the timer, part of this feature in this car is a sport mode for the engine and traction control.  This makes the throttle response crisper, changes to a hard rev limit, and relaxes the traction control nannies so you can have more fun while still not crashing.  
  • You don't have to waste money making your engine look good because nobody can see it anyway.  It runs and sounds fantastic and that is what really counts.
  • Fuel economy.  Around town I often get over 20mph even with my lead foot and short drives.  At the track I can go 4 sessions on a tank of fuel which is great.  The highway fuel economy is less good, around 26mpg.  If this car had a 7th gear it would likely do well over 30mpg.  At 75mph it is running at 3,000rpm.  Fuel economy is certainly not the focus of this car.

Gripes

This is a short list of minor whining.
  • Every other car now feels less good.  The bar has been raised very high and other cars that you once really liked are now below the bar.  
  • Crankcase breather issue.  Occasionally at the track it will carry oil over into the intake.  At times this causes smoke on start up.  I have only had this happen a few times and only at the track.  I may have overfilled it as well.  There is a motorsports breather available that fixes this.   
  • I cannot reset the oil change reminder without buying expensive tools.  
  • A weak battery can cause the body control to reset to factory defaults.  You have to go to the dealer to get features re-enabled.  Never let the battery get run down.  Keep a maintainer on it when storing.  Keep a fresh battery in it.
  • No radiator grilles.  There are many fixes for this.  Mine is in this article: https://jimroal.blogspot.com/2015/05/porsche-cayman-s-grilles.html

Maintenance & Repairs

Overall this is a very reliable and durable car.  I don't drive it easy either.  It is also surprisingly easy to work on.
  • Tires.  Since I do track days its rare tires make it 15k miles.  Nothing wrong with the car here.  Cost of the tires are actually what I consider reasonable.  I can get the top of the line Michelin Pilot Super Sports for under $1k.  I have the 18" rims.  For the track more negative camber is needed and you should also set the toe to 0.  I did a crude adjustment and the tires now wear better at the track.
  • Brakes.  Like tires, brakes will go fast if you do track days.  Good pads for this car cost about $200 per axle set (or $400 all around).  Again, these are good pads.  I'm sure you can find cheaper pads but never try to save money on brakes by going with poor quality.  I generally use Hawk pads.  I do have a street set and a different set for track.  More on brakes here.
  • Oil & filter.  This is very simple to do at home.  I back the car up on ramps.  The filter and drain plug are right next to each other.  It takes 8.5 quarts of Mobile One 0W-40.  Oil change costs about $80 to do at home.
  • Spark plugs.  When I first got this car I thought engine access would be a challenge but really it is not.  Changing the plugs involves removing the rear wheels and a small plastic panel.  After you do that you can easily see all the coils.  Its not hard at all.  
  • Interior rattles.  After 80k of Midwest crappy roads and track days it did develop a couple rattles.  One was around the drivers door speaker which I fixed by removing the door panel and tightening everything up.  Another was with the third brake light assembly in the hatch.  Again, I removed the hatch interior panel and tightened everything up.  Another was in the right rear speaker area, again removing trim, tightening stuff.  
  • Catalyst DTC.  When I bought the car with 60k miles it had a DTC for catalyst efficiency failure.  I addressed this by moving the HEGO for now.  I would like to upgrade to some good headers which will also correct this.  The efficiency fault just means it is not fully catalyzing the exhaust.  It does not cause any other problems.  This is likely doe to a crankcase breather issue causing oil carry-over.  That breather assembly was replaced just before I bought the car.
  • Battery.  Normal cost and easy to change.
  • Hood struts.  Typical cost and easy to change.  
  • Brake light switch.  Typical cost and easy to change.
  • CD Changer failed.  Who cares.  You have a wonderful flat 6!
  • Clean the radiators and install grilles.  Without grilles the radiators collect every leaf and rock they can find.  Mine were probably 50% plugged yet the car did not run hot.  Of course, I cleaned them before I went to the track.  
  • Starter noise.  I just replaced the starter.  It was under $200 for a reman and simple to change.  
  • Weak battery caused the body control to reset to default.  I had to take it to the dealer for an initialization procedure which involves connecting the service tool and enabling the features for the car.  It cost me $70.  Until I had that done my heated seats and garage door opener would not work.

Sunday, December 24, 2017

Mercedes E350 4matic first 100k miles

We bought a 2010 E350 4matic in the summer of 2015 with 34k miles on it.  Usually I search a wide radius and spend weeks looking for cars but in this case, it was the 2nd one we drove and we bought it only a few miles from our house.  I would have preferred red or blue but this car looks pretty good in silver in my opinion.  I think this is the best looking Mercedes sedan.  It is sportier looking than the S-Class in my opinion, but I would be open to an S-Class too.  This was the first Mercedes we ever owned but it will likely not be the last.  IN fact, we are shopping for another right now but we will also keep the E350.  I wanted to share our experience with this car after it passed 100k miles.  Actually it has 105k on it as I write this.  We have a 500 mile drive to visit our daughter that we make several times a year.  About 1/3 of the miles we put on this car are trips to see her.  The rest are normal mostly in-town miles.  We get all the seasons here including snow and ice.  Would I buy one again?  Heck yeah!  This has been a great car and I would highly recommend it to others.  These cars are a bargain as used cars.  They drop fast so you can pick up one with low mileage and only a few years old for less than half of new.  You can even find Certified Pre-Owned (CPO) for around half of new with a factory extended warranty.

Driving Impression

We have owned many cars over the years but this is the best overall car.  Driving the 500 mile trip as we often do leaves the driver with no fatigue.  The car inspires confidence and this makes for a low stress driving experience.  For a car of this size and weight it handles very good.  High speed driving feels comfortable and controlled.  Navigating through tight traffic is also as good as it gets.  The 4matic works well in poor traction conditions such as snow and ice.  With 105k on the car it honestly drives exactly the same as when we first got it.  I can get 27mpg on the highway at times, even when averaging over 70mph for the trip (which includes in-town driving).  We get about 20mph in town.  I am quite happy with that.  The engine has acceptable power for the car.  I would prefer the E63 AMG of course but it would be wasted on my wife and this is her daily driver.  

The Good Stuff

This has been a great car overall.  I would buy another in a heartbeat. 
  • Virtually non-existent driver fatigue even on long trips in bad weather, which we do often.
  • Excellent entertainment system with a dedicated volume knob.  By far the best way to control volume is a good old knob you can feel. The system are an AUX input and you can add an SD card adapter with in the dash.  It also had a hard drive you can store music on.  It has satellite radio built in for those who want that (which is not me by the way).  I wish it had Android Auto but it was built before that was available.
  • Excellent controls for the navigation and entertainment system.  The knob control is FAR better than a touch screen.  It is easy to control with one hand while keeping your eyes on the road.  Much less distracting that a touch screen that you have to look at.  
  • Great design of the center console door.  It is split in half and opens to each side.  This is far better than most than have a single hinge.
  • Great backup camera.
  • Excellent 4matic all wheel drive.  This system is full-time AWD with a center differential which is far superior to the automatic engaging part time AWD in most cars.  This system mechanically prevents loss of traction instead of just reacting to it.  It also has stability control to further enhance the system.
  • Paddle shifters.  The shifters have a great feel and short throw.
  • Transmission controls.  I actually like the Mercedes lever for selecting forward, neutral, reverse, and park.  It is out of the way and simple to use.  It is different than other cars and takes some getting used to.  It clears the console for drink holders and the drink holders are in exactly the right spot.  In most cars the shifter gets in the way and the drinks end up in an odd spot.
  • Entertainment display.  I love the way the entertainment display is placed in the dash like it actually was designed for it.  Many new cars have this ugly tablet looking thing sticking out of the dash like it was and afterthought or aftermarket.  Also, I like that it is not a touch screen.  The controls are far superior to a touch screen and the screen remains clean.  
  • Hook for grocery bags in trunk.  This is a small but awesome feature to keep your groceries from flailing around in the trunk.  Nets are OK but this hook is far better.  
  • I can reset the service reminders myself without any tools!  This is a great feature missing from most cars these days.  Honestly I am surprised Mercedes would do this.  I do my own service and I need to be able to reset the maintenance reminders myself and this car has a way to do that using only the steering wheel buttons.
  • Engine access is very open.  I replaced the spark plugs and this is the easiest car I have ever changed plugs on.  The air cleaner assembly comes off with no tools and you can then see all the coils in plain sight with open access.  Most modern cars have the engine tucked so deep under the windshield that you can only see half the engine.  
  • Ride.  This car is a great compromise between smooth ride and good handling.  It is serene even at high speeds.  Very low road noise.  You can have a conversation at a whisper while going 90mph even on crappy Midwest roads.  It handles fantastic for a car of this size and weight.  
  • Cruise control.  Mercedes did a great job with the cruise control.  You can easily see your set speed on the speedometer.  The simple lever has 2 detents for up (accelerate) and down (decelerate).  Clicking in the first detect changes the set speed by 1mph.  Clicking to the 2nd detent however takes you to the nearest 5mph point.  For instance, if you are going 72mph and you click it up to the 2nd detent once, you will go to 75mph.  If you clicked it twice to the 2nd detent you will go to 80mph.  
  • The trip computer. It has an automatic trip computer feature that tracks your trips automatically.  It makes some assumptions about what constitutes a trip and it is pretty good.  You can of course manually start your trips too if you want.
  • Everything in the car requires little effort to operate.  It is a great car for older folks or people with arthritis because of this.  

Gripes

This is a short list but, as with most cars (Porsche Cayman excluded) there are a few things that could be better.

  • Seats.  The seats are very comfortable except for the fake leather.  I think you can get real leather as an option and I would.  While the fake leather does not wear at all, if does not feel good when wearing shorts and it gets hotter than real leather.  Perforated leather would be a great upgrade here.
  • Drivers side blind spot.  The drivers side mirror is small and leaves a big blind spot.  I added a small convex mirror to correct this.  Very simple fix but Mercedes should have dealt with this in my opinion.  Some models has the blind spot warning system which would also be good.
  • Transmission.  The transmission shifts to a high gear and holds it to the bitter end.  This is actually very common with newer cars.  They do this to optimize fuel economy but it makes the car feel sluggish and jerky at times.  The worst part is merging on from a long ramp such as a cloverleaf.  The transmission shifts all the way up and then when you step into it to merge there is no power and a big delay in downshifting.  Here is where I use the paddle shifters to manually lock a lower gear.  Speaking of the shifters, they seem to be a mere suggestion rather than a command.  Sometimes there is a delay between requesting a lower gear and actually getting it.  Under certain conditions such as requesting an upshift when going downhill, it ignores you all together even when the RPM will still be well below any concern level.  The transmission can occasionally have a jerky downshift.  This improved dramatically after having the fluid and filter changed though. 
  • Headlights.  They are fine except I got used to HIDs in my Jaguar and Porsche and my E350 does not have the HID option.  You can get the E-class with HIDs and I would highly recommend it.  You can also retrofit HID which I may do.  
  • Cruise control braking.  OK, many would call this a feature but I am not a fan.  If your speed exceeds the set speed of the cruise control by too much, the car will actually apply the brakes to get the speed back down.  I would prefer it not do this under most conditions.  We live in the flat land but in mountains you would actually want to downshift for this, not apply the brakes.  My use case on the flat land is when passing with the cruise set.  I accelerate to get around and then once I am back in the right lane I release the throttle to allow the cruise to resume.  This braking feature kicks in and slows me down rapidly which is not necessary or welcome.  It is easy to just disengage the cruise to pass, then re-engage it after your speed get back to the cruise set speed.
  • Seat lumbar controls.  Actually I have this same issue with many cars lumbar controls.  They are not very intuitive and it seems challenging at times to get them set right.
  • The entertainment system lacks Bluetooth A2DP (music streaming).  It's crazy how many cars lack this still.  A2DP has been around for a long time before this car was built.  Flip phones supported it back in the eary 2000's yet this 2010 does not support it.  Stupid.  It does have Bluetooth hands-free for phone calls and that works fine.  It also has a port in the glove box where you can connect all sorts of things such as USB and 3.5mm jack with the right adapters.

Repairs & Maintenance

So far this car has been one of the most reliable cars I have owned.  It is also easy to maintain.  While this is the first year of the W212 E-class it is a very reliable and durable car.   
  • The biggest maintenance cost with the exception of tires has been the transmission service which cost me $433 to have done at a local shop. The dealer wanted over $700.  Mercedes recommend this every 40k miles which seems excessive.  The fluid is an expensive synthetic which is actually good for life but they recommend changing it due to clutch material building up in the fluid.  My Jaguars used a Mercedes transmission too and back then they claimed they did not ever need a fluid change.  I had a problem with my XJR at 120k miles because of debris in the fluid so I know why they want it changed.  I changed it at 80k.
  • Spark plugs.  This was very easy to do at home with only basic tools.  I don't think I spent more than 20 minutes on it.     
  • Rear brake rotors and pads.  I have replaced these once due to normal wear.  Parts cost is typical of these components, nothing out of the ordinary and simple to replace. I may not have needed new rotors but I don't skimp on brakes so I replaced them anyway.  I have yet to do the fronts after 105k miles.
  • Tires.  Normal wear item of course and I get decent miles from a set.  Cost is typical for a car like this, $229 each on Tire Rack for the OEM Continentals.  Tires are not an area to skimp on so I do not look for cheaper brands.  I also changed the TPMS sensors when I did the tires.  They were all working fine but I wanted to get new ones with the tires rather than wait for them to have dead batteries.  Cost for these was also typical at $52 each on Tire Rack.
  • Gas cap.  I had the check engine light come on.  I pulled the DTCs and I had 2 evaporative emissions DTCs.  This happened several times and I check to make sure the cap was tight.  It ended up being a leaky gas cap.  Simple and inexpensive fix.
  • Air filters.  These have a bunch of screws to access them but it is still not hard.  There are 2.  Cost is typical of air filters. 
  • Oil changes.  I use the recommended 0W-40 Mobile One oil.  Filter change is simple.  Cost for the whole oil change is about $70 and it is very simple to do.  
  • Drivers lower seat cover tear.  There is a seam that tears on some of these cars over time.  I have a new cover on the way that cost me $229.  I will update with how this goes.
  • HVAC fan motor noise.  It occasionally makes a faint squeaking type noise at certain fan speeds.  This is a common issue in most cars except most cars have enough road noise you don't hear it.  I have one on order for $180.  I will update after I replaced it.
  • Battery.  Typical maintenance item.  Lasted about normal.  Simple replacement.  Typical cost.  

I also posted this review http://jimroal.blogspot.com/2016/12/owning-mercedes-e350-4matic.html after we had the car for a while.  

Monday, November 20, 2017

Porsche 987/997 door panel removal


Removing the door panel on cars can be tricky and you often break things.  The are generally attached with an assortment of hidden screws and plastic clips.  I recently removed the drivers door panel on my 2006 Cayman S so I thought I would share some handy info for the next person.

Here are the tools you will need.

  • Torx T30 bit and the proper driver or a long T30
  • Flat blade screwdriver
  • Putty knife

I also had a T30 set which I used for convenience.

Start by removing the trim at the top rear of the door panel and the screw under it.


Then remove the top front panel and the screw under it.  Be careful with this panel.  Pry the bottom edge out and then lift up to remove.  This panel hooks at the top so do not pry on the top.


Now remove the leather trim cover over the door pull handle.  Do this by opening the compartment and prying out on the leather covered trim.

It looks like this with the trim removed.
Now remove the screws at the front and back that are set deeply into the panel.


Now remove the round plastic cover and the screw behind it, both being behind the door latch handle.  You need to hold the handle all the way out to do this.

 This one is best accessed with a shorter torx to ensure you are squarely aligned and don't strip the torx screw or bit.  The tool shown above is not ideal actually.

Next you need to carefully pry the bottom edge of the door panel out releasing the clips.  Here is a photo of the inside of the door panel showing where the plastic clips are.

Unfortunately it seems there is no great way to do this.  Often one or 2 of the clips will not properly release and the panel area holding the clip will break instead.  Plan ahead with some good epoxy to fix the damage.

Once you have the panel disconnected from the door, you need to disconnect the electrical connectors and the door latch cable.


 The door handle cable clips in place with that white plastic cable end.  Start by prying the ends outward away from each other.  Then slide the clip forward until it disengages with the slot.  Once the white plastic cable end is apart from the panel, rotate the cable assembly perpendicular with the hole to disengage the cable.
Be careful with the door latch cable as it does not have much room to work with and you can easily break it.  Depending on options, you may not have all the same connections.

Here is what the inside of the door looks like.


The clips hare 2 piece where the center expands the outer piece when the door panel is pushed in place.  When you pull the door panel, the center is supposed to pull out releasing the clip.  See these 2 clips in the photo below.
Notice the clip on the left is released and the one on the right is still expanded.  They are supposed to release like the one on the left.  If this happens, remove the clip and release it by pressing the center back out.  I used a vice and a hammer for this.

Make sure all 4 tips tuck under the tip properly.  If one is sticking out, push the center in far enough to tuck it back in the then press the center back out fully.

Sunday, November 12, 2017

Testing a cars charging system with only simple tools

There are many things that can cause a car to not start.  First, lets clarify the difference between not cranking and not starting.

Cranking is when the starter spins the engine.  This is done by the starter motor engaging the engine and turning the crankshaft.  Back in the very old days this was actually done by a person with a crank handle directly cranking the engine over by hand, hence the term "cranking".  For the last 100 years, this is done by a starter motor.

Starting is a more general term to mean the engine has not reached a running state.  Starting includes first cranking and then the engine generating combustion to run on its own without the starter.  This requires fuel, spark, cranking, and a bunch of mechanical bits working in harmony.

The rest of this discussion is just about cranking.  The 2 most common components at the root cause of failing to crank are the battery and the starter.
Figure 5-1: Electrical System
Figure 5-2: Starting System

Here is a good article introducing some of these basic components: http://www.military.com/off-duty/autos/auto-repair-electrical-system-tips.html

There are interlocks and security systems that may prevent the vehicle from attempting to crank.  If this happens your car won't even try, meaning that to turn the key to the crank (start) position and year hear nothing happen.  A completely dead battery can also cause this but of course you would have already noticed that no electrical systems are working at all.  You have to use the key to unlock the car as the remote won't work.  There will be no dome light or dash warning lights.  Nothing.  If this is the case, start by charging the battery with a charger, or jump starting.

If the car does have battery power, then next question is does it have enough.  If you are able to unlock with the remote, and you see the done light and other lights in the car, then your battery is not completely dead.  However, it still may not be bale to crank.  Often this will cause the engine to crank slowly or you may just hear clicking near the engine.  If turning the key to crank results in nothing, and the dome light and other lights don't even dim, then something is preventing the car from attempting to crank.  This may be the security system or interlocks such as neutral trans gear or clutch pedal not depressed.

Another common cause of cranking problems is corroded battery terminals.  The battery has acid in it but this acid can seep out or come out as vapor and corrode the terminals.  Here is a photo of badly corroded terminals.
Image result for corroded battery terminals
This will break the connection so the battery power cannot be used by the car.  This can be cleaned using baking soda and water.  Remove the terminals and clean the connection between the battery post and terminal with a wire brush.  You can by a terminal cleaner at any parts store. Here is a typical example of a battery terminal cleaner.
Image result for corroded battery terminals cleaner
Be careful as the terminals may look OK on the outside bey be corroded between the battery post and terminal where it matters.  Sometimes you can hear crackling or bits of smoke while trying to crank if the corrosion is there.  Sometimes you can loosen and twist the terminal on the battery a bit and get it to work for a while.  

If all that passes and the engine does indeed attempt to crank it needs to crank the engine fast enough to start.  A weak battery will generally show up with the symptom of slow cranking or not being able to completely crank.  This is somewhat hard to describe.  The sound of the engine cranking is different, slower.  It may sometimes appear to stop cranking for short periods and then resume slowly.  Eventually is will stop cranking and often make clicking noises.  The battery has a finite life.  It will die eventually.  Eventually can be in as little as 3 years, or sooner if it experiences a premature failure, which does happen.  It is the most likely cause of not cranking, if the electrical system is allowing the attempt to crank.  Generally this problem will start out small and get worse over time.  You may notice a bit slower crank that continues to get a bit worse over the course of a week or two.  Some battery failures are much more instant where it goes from working OK to not even being able to crank on the next crank attempt.

If the alternator is not charging this will also deplete the battery and give similar symptoms to a weak battery.  There are some quick checks you can make to see if your alternator is working.  First of all there is a charging indicator in the car.  Almost all cars have a light or a message on the display if the alternator is not working. This light will be ON normally with the key ON and the engine not running.  However, if it stays ON while the engine is running there is a charging system problem.
 

There are other failure modes that may cause no charging yet this light does not come ON.  Here are some quick checks you can do to confirm the charging system is working.

https://photos.app.goo.gl/uwHjBGnB4NI1j76r1

The alternator is belt driven from the engine crankshaft.  If it is not charging, make sure the belt is turing the alternator.  Some cars also have a large fuse between the alternator and the battery.  Make sure that fuse is in place and not blown.

If your battery is OK and your alternator is working but you still have slow cranking or it fails to crank, you may have something in the electrical system that is drawing too much power when  the car is not running.  Check for things like dome light or glove box lights being left ON.  Modern cars have many complex electrical system that do draw some power even when the engine is not running.  This makes finding an inappropriate draw more difficult and vehicle specific.  Some things to look for is relays sticking ON.  This issue can often cause an intermittent draw which is even harder to find.  One of the more likely relays to stick is the fuel pump relay.  If you shut the car OFF and exit the vehicle but hear a humming noise from under the car, your fuel pump relay may be stuck ON.  These relays are often about ice cube sized blocks in one of the fuse boxes.


Sunday, October 1, 2017

Porsche Cayman S Brakes

I do track days in my 2006 Porsche Cayman S.  The car is basically stock.  This article is a collection of my thoughts around the topic of brakes.

Pads

When I got the car it had a little over 60k miles on it.  I replaced the brake pads with Hawk HPS.  They seemed OK but not really an improvement over stock.  At Putnam Park and Autobahn I did notice these pads would start to fade when hot so I switched to Hawk Street/Race pads which made a huge difference.  These Street/Race pads are basically race pads that work down to cold temperatures.  They are noisy and create copious amounts of dust like any other race pad so its not something you actually want to drive around with daily but they do work for the street, unlike race only pads.  The nice thing about these is you can swap them in at home and drive to/from the track with them and be safe.  The noise when stopping at times is only somewhat embarrassing but not enough to be worth the hassle of swapping pads at the track.  The stopping power is more than double the stock or HPS pads.  They create far more friction for the same pedal pressure.  So much that it takes some getting used to as the first few times you hit the brakes after swapping them in you are surprised by how hard it stops with such little effort.  Once you get used to driving with them, swapping back to the street pads feels a bit alarming at first.

Tire Rack produced this chart showing the various Hawk brake pads:
Hawk Brake Pad Comparison - Tire Rack

MU is the coefficient of friction, higher means more friction.  More friction means more braking force for a given pedal pressure.  Notice that most race pads do not work well at low temperatures which makes them a problem for street use.  In this case low temperature is often well above ambient.  As you can see some of the pads perform very poorly below 300F.  In addition to the problems at low temperatures, they are generally very noisy and can produce copious amounts of dust too.

Rotors

Most Porsches come from the factory with drilled rotors.  The reason drilled rotors became popular is performance applications decades ago was because of a gas layer that would form at high temperatures cause interference between the pad and rotor.  Modern performance brake pads have significantly reduced this problem, and better solutions have evolved.  One of the problems with drilled rotors is they can crack under the temperatures and stress of track use.  Mine started cracking at Road America which is particularly hard on brakes.  Here is a photo showing the small cracks starting to form.
This rotor is not too bad but those cracks can grow.  In extreme cases, the rotor can break off in chunks which is dangerous.  The best solution for track duty is slotted rotors.  I switched my rotors to Sebro slotted.  This photo shows the slotted version next to the factory rotors.

The slots in the rotors help clear the gas layer but don't tend to crack like the drilled rotors.  The slotted rotors also have more metal mass to absorb more heat.  This will help slow down the heating some under hard braking.  The heat can then be released between corners when the brakes are released.

Cooling

Brakes slow the car down by converting mechanical energy (momentum) into heat.  Changing the momentum of the car requires power (HP).  The engine provides the power to accelerate and the brakes provide the power to decelerate (in conventional powertrains).  Normally the braking power capability is much higher than the engine power.  This is a large amount of energy that the brakes much dump as heat.  The rotors require airflow to facilitate this cooling.  The Cayman/Boxster and 911 sports cars have brake cooling ducts to guide more air to the rotors.  The Porsche GT (GT2, GT3, and GT4) cars have more effective cooling ducts that can be fitted to the other 911 and Cayman/Boxster models.  I installed GT3 cooling ducts on my Cayman S.

Here is a photo of the factory cooling duct.
Here is a comparison of factory versus GT3 cooling ducts.
 Here is the GT3 cooling duct installed.

Brake Hoses

The brake hydraulic system has very high pressures.  Most of the system uses steel allow lines to route the fluid between the brake components.  However, the brake calipers must move relative to the chassis so hoses are required for this part.  Those hoses are generally made of reinforced rubber.  The problem is that even though these hoses are reinforced to reduce expansion, they still do exhibit some expansion under high pressures.  The fix for this is stainless steel hoses.  There are several available in the aftermarket but make sure you use DOT and TUV approved hoses.  

Brake Fluid

Brake fluid is NOT created equal!  Also, good quality fluid with high wet and dry boiling points is very important, especially in a car that will be used on the track.  When driving at speed on the road course, the car will see repeated heavy braking for 25 minutes or more at a time.  This will cause the calipers to heat up.  If the temperature gets high enough, the fluid can boil.  When this happens the boiling displaces fluid in the caliper with gas.  The displaced fluid is pushed back into the master cylinder.  The gas is compressible.  The next time you hit the brakes the pedal goes to the floor with little to no braking at all.  This is a very dangerous situation and must be avoided.  Any decent track inspection checklist will include replacing the brake fluid just before the event, generally within 30 days.  This is a simple procedure and even expensive brake fluid is far cheaper than loosing brakes at the track.  A good DOT 4 brake fluid is Motul 600 or 660 which is available from many parts stores that sell performance products.  There are other high performance brake fluids.  Pay attention to the wet and dry boiling points.  The reason it needs to be changed so often is water will mix with brake fluid, unlike oils.  Humidity and condensation will get into the brake fluid over time.  Vehicles that do not see high brake temperatures are far less likely to have a problem.     

Tuesday, July 4, 2017

What good is a Smartwatch?

I waited a long time to even try out a smartwatch.  I don't like wearing watches in the first place, and the phone in my pocket has all the info I need.  I didn't see the use for a smartwatch.  I do however, like tracking my fitness especially with bicycling.  I had a Polar Bluetooth heart rate sensor that I used but it quit working.  I also did not like wearing it.  I wanted a better heart rate sensor so I decided to look into smartwatches.

I chose the Motorola Moto 360 Sport.  These have been around for a while and you can often find them on sale for a great price.  I think I paid $169 for mine but I have seen them under $100 sometimes.  It has the optical heart rate sensor.  It came with Android Wear 1.5 but it should be upgraded to Wear 2.0 any day.

Uses

While I was certainly a naysayer on smartwatches, I have found more uses for mine than I thought.  I wear it every day now.  I don't think I would spend over $200 to get one but for the price I paid, I feel I am getting the value from it.

Fitness Tracking

May first use for the watch was for heart-rate monitoring during bike rides and walks.  I wanted a device that would integrate with the apps I use for tracking these activities.  I use Google Fit for my daily activity tracking.  I was using Cardio Trainer for bicycling.  I had also used My Tracks for this in the past.  It turns out that Cardio Trainer and My Tracks do not support the heart rate from this device.  Lame!  So, I switch to a more popular biking app called Strava.  This is a better app than Cardio Trainer anyway and it gives nice graphs for heart rate, as well as the rest of the data.  It also integrates with Google Fit.  Very nice.

Notifications

Sometimes it would be handy to see notifications without pulling the phone from my pocket.  I know this is a first world problem but what the heck.  Some of the more useful things are:
  • Rejecting callers.  Spam calling is totally out of control and it is very handy when one of these calls comes in to just glance at the caller info on the watch, and swipe it away.  
  • Navigation.  I didn't expect this one.  I am all about stopping distracted drivers.  People need to hang up and drive.  You should not take your eyes off the road.  I was using Google Maps to navigate on a trip.  The phone was on the seat, not visible while driving.  I was on a long straight stretch of interstate and wondered how far it was to my next turn.  I glanced at my watch and there it was.  Just a small message with the distance to, and direction of the next turn.  Nice.  
  • Seeing the time and date.  It is a watch after all.  There are many useful watch faces that are informative.  It shows the time and basic info even when the screen is off.
  • Seeing general notifications.

Development

As an amateur Android developer I wanted a device that I could write apps for if I wanted to.  Learning Android Wear development should be easier since I am familiar with Android. The first app I started for Android Wear is a remote control for my Gamin Virb Ultra 30 action camera.  I just wanted to be able to start/stop recording and maybe snap a photo using the watch as the remote.  I did get the remote working on the phone first so I could learn how to interact with the Garmin.  Once I did that, I created a wear app for the watch.  Getting the basics going was not hard.  I don't have this app done yet though.  There is a feature I depended on that Wear 1.5 does not support.  The alternative was to use the watch app in conjunction with its phone counterpart to control the camera.  That is a work in progress.

Smartphone Shopping Summer 2017 Edition

Overview

I have not posted about smartphone shopping for a while so I thought I would capture my thoughts here as some friends have been in the market.  As you know, I prefer Android devices for many reasons:
  • Open source software
  • Large Play Store full of great apps
  • Compared to other operating systems, Android allows more flexibility.
  • Google is not evil.  There are many free features and services that are best in class
  • App to app integration.  Sharing for instance.  You can share from any app to any app you want.  Nobody is forcing you down what they want.
  • Many excellent devices to choose from.  This competition is great for both price and features.
  • Micro-USB or USB-C standards.  You can buy cables, chargers, etc from whoever you want as competitive prices.
  • SD card support.  You are not stuck with the space the device is made with.  Some support Micro-SD cards up to 2TB.  
  • Access to see files, folders, data, photos, etc.  You can also simply connect to a PC and browse it like a USB memory stick.  

Brands, Skins, Preinstalled Apps

I lean heavily towards Motorola devices.  I think they offer the best value.  Other devices have higher end specs but they come with a bunch of unwanted skins and bloatware.  For instance, Samsung, LG, and HTC all have very heavy skinned versions of Android.  It is so heavy I have a hard time finding things.  Samsung also makes their own versions of basic apps that replace the Google versions.  This is just a mess in my opinion.  These are also installed in the system meaning you can't really remove them without rooting.  All of this just hogs up more device resources so that faster process and more RAM are needed because of all this bloatware.  I don't understand why these device makers continue to do this when article after article complain about it, it costs them to make and maintain it, and many users don't even want it.  Motorola has the closest to stock Android as you can get short of a Nexus or Pixel.  

It is very interesting that devices are marketed to the public showing pre-installed apps as a feature worth paying for.  To me that is like marketing a sedan with pre-installed junk welded into the trunk that you don't want and can't remove.  Now you have a less usable car.  You can't choose what is in the trunk.  Definitely get the device with the least pre-installed stuff as you can get.  Installing apps is very simple and there are many great free apps on the Play Store.  

While I have had Motorola devices almost exclusively, I have had a Lenovo tablet.  I like the hardware but the OS is terrible.  Lenovo has a bunch of bloatware in this device.  The Lenovo launcher was the worst I have ever used.  It had apps permanently in the home screen.   They wanted to force you to use their awful apps, and those they were paid to pre-install.  I was able to fix the home screen with Google Now launcher and disable all the bloatware.  I was able to even uninstall some of it.  

My Choices

So, which device would I buy if I were shopping right now?  Here are some features that I prioritize:
  • Qualcomm Quick Charge.  This is a game changer.  Many devices has other fast charging technologies but they don't really compete.  Quick Charge uses a proprietary technique to boost the voltage so that standard cables work.  You can only boost the current so far before the loss in the cable becomes a real problem.  Most chargers only support 5V charging.  Quick Charge goes up to 12V.  You can put almost 3 times the power through the same cable.  I have Quick Charge 2.0 on my 2015 Moto-X and this is a must have feature for me.
  • A big battery.  A smartphone with a dead battery is useless.  This obsession with thin is ridiculous.  Honestly, today's phones are often too thin.  I would like to have a 6,000mAh or bigger battery if I could and I would gladly put up with the extra 6mm.  
  • At least 4GB of ram.  This is important so the device does not lag when running large apps or switching between them.  Today we also have many background processes and the device needs this ram to manage it efficiently.
  • A fast 64bit multi-core CPU running at over 2GHz.  I would say a quad minimum but 6 or 8 even better.  .  
  • It must be unlocked and free of carrier software.  
  • A good camera.  These are getting better all the time so there are many good choices here.  I don't need to record at 4k but HD is needed.  I want tomething that is fast.  I want to be able to capture moments as they happen so it must open, focus, and snap very fast.
  • A decent sized screen.  I like something in the 5.5" range as my vision is not so great anymore.  I don't need over HD though.  Even 720HD would be fine for me.  The higher resolution you get, the more processing power it eats up, which also eats more battery.  
  • Must work on Verizon.  I have a love/hate relationship with Verizon.  They have clearly become evil but they simply have the best network.  I still have the old unlimited plan.  Around town I often get over 50Mb speeds.  It is rare that I don't have service even on trips.  
  • Regardless of an SD slot, the device needs at least 32GB of memory.  This is so you can install all apps and app data on the device.
  • An SD card slot.  While you want all your apps on the device, the SD card opens up tons of space for media.  This is especially important if you shoot much video.  Strore your media, photos, and video on the SD card and save the on-board memory for apps.  Ideally the device would support the full SDXC standard which means you can use cards up to 2TB (even though that size is not yet available).  Several phones do support this.  
  • NFC.  I have starting using mobile pay.  I tried Android Pay but my cards stopped supporting it.  Now I use Capital One Wallet and it generally works well.  Honestly it is still faster and easier to just use the card in most cases but I am really hoping someday we won't need a physical wallet and this is the start of that.  I just want this option.  
  • Fingerprint sensor.  While this is low on my list, and is not a must have, it is handy at times.  
  • A good old fashioned headphone jack.  This is low on my priority list but it is something to consider these days.  I tend to prefer Bluetooth anyway so I don't need this very often.  
Here are the ones at the top of my list.

Moto G5 Plus 4GB/64GB

I would get the one with 4GB Ram which is only available with 64GB memory.  This device retails for $299 which makes it a bargain.  It has 4GB ram which gives apps plenty of space without having to swap in and out.  That makes the device more responsive, especially when switching between apps.  The 64GB memory is also nice as you want all your apps and their data on the device memory versus and SD card for speed.  SD cards are great for media and data, and this device has the slot.  It is unlocked so there is no carrier bloatware and this should also make updates faster.  It has Quick Charge 3.0 for fast battery charging.  It does lack NFC for mobile pay and certain other features, if you use that.  It has a Snapdragon 625 chip set clocked at 2.0GHz so it should keep up with most apps, except maybe some of the games that need top end performance.  For the vast majority of users, this device should be a great fit.

Moto G5S Plus

Coming soon.  This is an upgrade to the Moto G5 Plus.

Moto Z2 Play

The Moto Z line is Motorola's flagship devices.  The real unique thing about them is the Moto Mods. Moto Mods are magnetically attached devices that cover the back of the phone.  Some of the most appealing for me are the batteries.   While the Moto Z devices are silly thin in my opinion, once you attach a Moto Mods battery, it is about right.  This is even better than the removable batteries of yesteryear since you can swap the Moto Mod when the device is ON.  Just pop one off and attach the other.  Some of the Moto Mod batteries also have quick charge.  Other have wireless charge.  Several options and more coming.  The Moto Z2 Play is out now, although only the Verizon locked version right now.  The website says the unlocked version is coming soon though.  This device is priced starting at $408 retail (not sure about the unlocked price) which is well below the premium phones with often cost over $700.  It has a Snapdragon 626 clocked at 2.2 GHz.  It has Quick Charge 3.0.  There is a version with 4GB of ram which is the one I would recommend but they don't have it available yet and I have not seen the price for that version.  The other Moto Z phones also look great but for most users, probably not worth the price point.  I would avoid the carrier locked versions myself.  The Moto Z Force Droid looks great except it is locked on Verizon and full of their bloatware.  It does have the shatterproof screen, a larger battery, and higher end specs which is great.

We bought one of these.  We got the Verizon only device with 32GB so it only has 3GB ram too.  We also got a battery mod with wireless charging.  Battery life even without the battery mod is excellent.  Adding the battery mod makes this a 2-day device with moderate to heavy use.  With the battery mod fitted, the device is a bit heavy.  I don't mind the weight but some may.

It has USB-C and Quick Charge 3.0 but it will not quick charge on Quick Charge 2.0 devices for some reason.  It quick charges fine on all my Quick Charge 3.0 devices including car chargers and battery backs.  On Quick Charge 2.0 devices it just charges regular.  There are good Quick Charge 3.0 accessories out there relatively cheap.

Update: We have 2 of these, one Verizon and the other unlocked.  The battery life is outstanding even without a mod battery.  Add even the smallest mod battery and 2 days of heavy use is no problem.

Moto X4

This device is not actually announced yet but the leaks are getting better all the time.  We expect this to be released this fall.  If the leaks are correct, this looks like a great upper-mid tier device.  

Google Pixel 2  

This is sure to have the cleanest Android experience you can get.  You will pay for it though.  This will be the second iteration of the new Pixel phone line and hopefully they fix some of the issues they had with the first. 

Update: This came out and it has the best camera on the market.  It also looks like they did make improvements in the right areas.  Great device but you do pay a steep price for it.