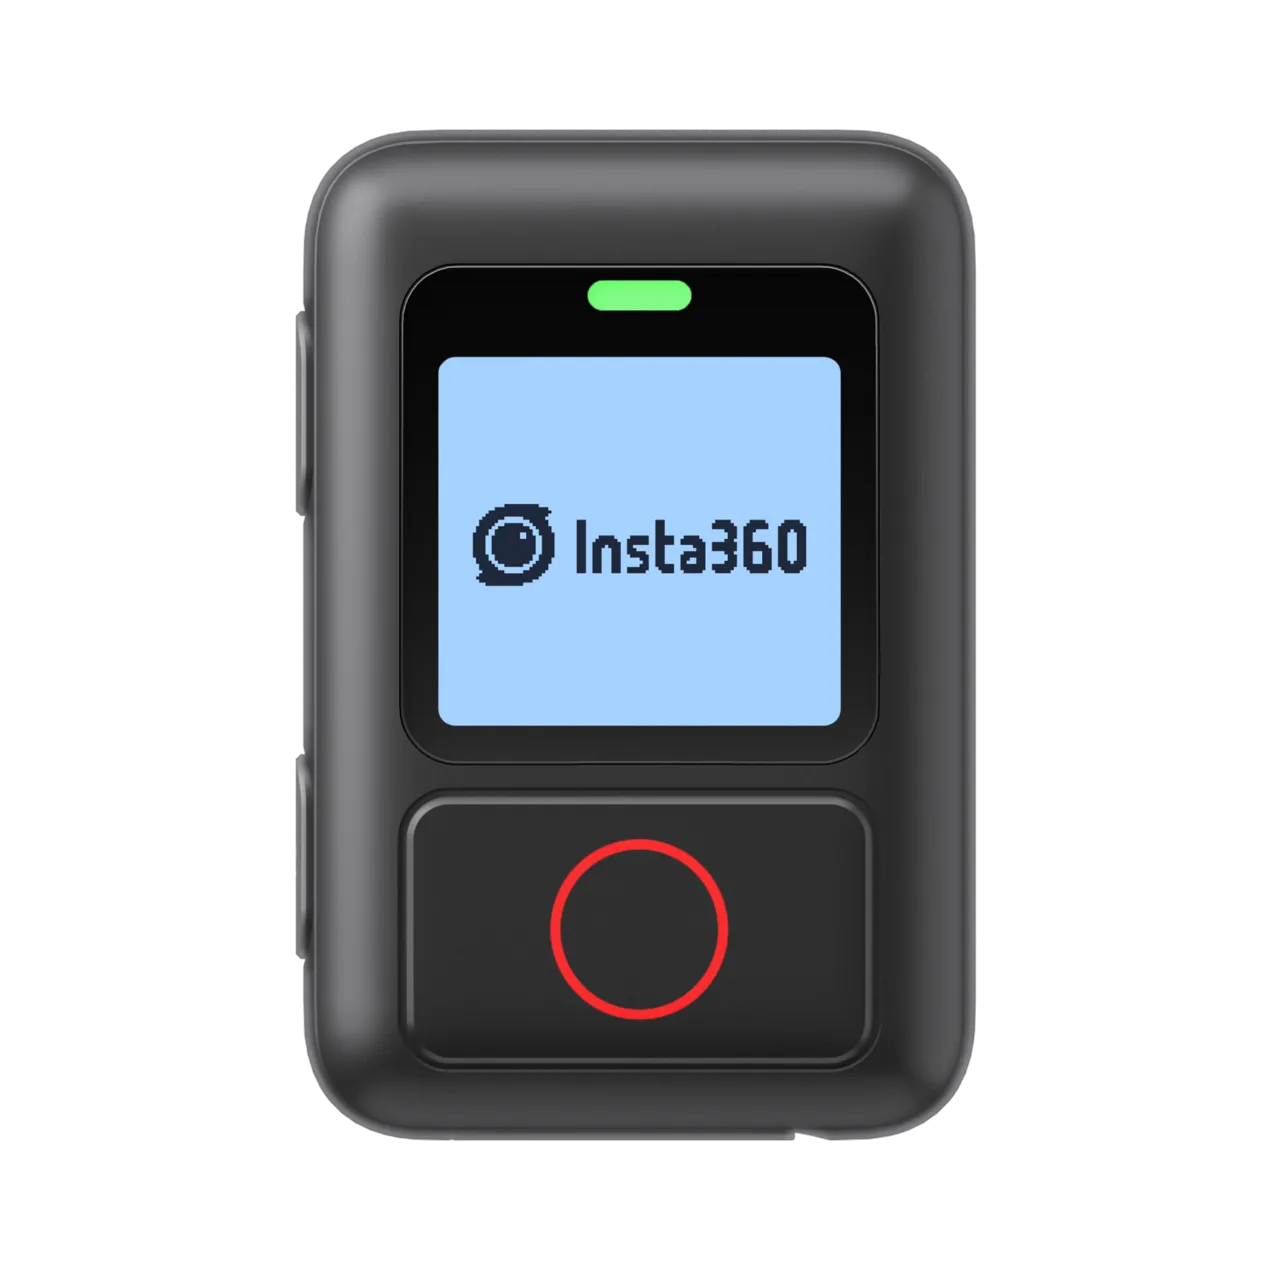
I post videos to YouTube of my eMTB and dual sport motorcycle rides pretty much every weekend. I posted an article about my setup here: https://jimroal.blogspot.com/2025/01/my-action-camera-setup.html. The Insta360 X3 was a fantastic camera, and now they have come way down in price. I bought mine in 2023 and it has had heavy rough use since then. Earlier this year it stopped connecting via USB, but it would still charge OK. This was minor as I just popped the SD card out to process the video. More recently additional problems cropped up. Every once in a while it seemed to not interact right with the remote. Sometimes I would miss catching video. Then it started dating files wrong. The final straw was the video became jittery and blurry at times on rough terrain (most of my riding). I had been eying the X4 but decided it was not enough of an upgrade. Then the X5 came out while my X3 was having these issues. I was caught at a time of weakness so I bought the X5.
So far I like what I see. As an engineer I expect each generation of a product to take the lessons learned from the prior to make the new one even better and the X5 does not disappoint. The X3 was a great camera but I had a few gripes with it.
The first issue is the exposed lenses were not replaceable. Scratch or break one and the camera is done. So they came out with plastic lens convers. I tried those but they were so easily scratched and they get much dustier so it was unusable for my needs. I finally just removed them. Here is a video where a branch severely damaged the lens cover, ruining the rest of the video. The X4 came with better replaceable lens covers but it was still a lens cover. Finally the X5 has replaceable lenses. Well done!
The sound was fine unless you had any wind. This has long been true for nearly all cameras to be fair. The X3 has small foam mic covers you could stuck on which helped some. I have not tried the X5 in much wind yet but they claim to have many improvements here. On the motorcycle I use an external mic with both foam and fuzzy covers which solves the problem.
5.7k video sounds great but you simply need more for 360. The X4 upgraded to 8k in 360, and the X5 continues this. Honestly I wish it were even higher. If you shoot in 360 and want to create flat video from it, you are stuck with 1080. The X5 can export 4k flat video from the 8k 360 video. This means you can shoot in 360 and still extract a great 4K frame from it. Generally I upload to YouTube in single lens 4k with the X3. Now with the X5 I can shoot in 360 and have the option to create a 4k framed video from it. You can also snapshot a 4k photo from 360 video. The X3 would only take 1080 snapshots from 360.
The X3 did great outdoors but not so much in darker indoor conditions. The X5 made several improvements here with larger sensors and improved shooting modes for low light.
Battery life was a challenge on the X3. They gave the X5 much more run-time, more than double.
The foam case for the X3 did not work well at all. The X5 has a great zipper foam case. I can even leave my ball mount on and it zips up to it, protecting the camera well.
I added the external mic adapter, similar to what I had with the X3. I noticed these say they are not water resistant, and not suitable for high vibration environments. I did have the adapter come off the X3 a few times. Generally after a hard hit, like riding over a rock. I used a small Velcro strap to hold it in on the X3. On the X5 I made a small metal support that uses the 1/4" mount. Insta360 now has a Bluetooth external mic which I may switch to. I have a few hesitations with it though. It seems to have no wind protection and it is not stereo. Wind noise is a huge problem on a motorcycle. The image below shows the external mic covered with foam and then fuzzy wind protection as well. More details about the mic are in this article: https://jimroal.blogspot.com/2025/01/my-action-camera-setup.html .
Here is the first 360 video I shot with the X5. This uses the internal mic which does a surprising good job at eliminating wind noise.
I had the bitrate and sharpness both a medium when I shot that. I usually set those both to high. I use a 512GB SD card so I can fit hours of video. The camera can support cards up to 1TB.
Here are some of the first videos I shot with this camera.
I have recorded several rides now and have experienced issues with the power/mic adapter losing connection. To be fair Insta360 says this adapter is not rated for vibration. I am also concerned with the high vibration and impact on the camera. I added the Insta360 vibration mount.
This goes between the Ram Mount ball and the camera.
I ride off-road in very dusty environments. One problem I have is with all the zippers on my riding gear, backpack, and storage bags on the motorcycle and bike. When they get dusty they are very hard to zip and unzip. They get jammed up with the layer of dust. I blow them out with compressed air and that temporarily makes them less bad but it does not take long riding for them to jam up again.
My storage bags on the bike are not waterproof. When I get done riding I rinse the dust off the bike before putting it away. When I do that some moisture gets into the storage bags. I decided it may help to Scotchgard the bags.
It is a simple spray coating that helps repel water. It also happens to be a great non-oil based zipper lubricant which works great in dusty environments. Since I sprayed the outside of the bags, the Scotchgard got into the zippers too. I immediately noticed my zippers were smooth and easy. It was a stark difference. Even better, they stayed that way even after several dusty rides. Many of my zippers I have issues with are plastic. The plastic zippers are much worse for the dust jamming them up. However, this Scotchgard trick seems to nearly eliminate the problem and it even lasts.
After I discovered this, I applied Scotchgard to all the zippers on my gear (riding pants, jacket, etc.), my backpack, and the bags on my bike. What a difference!
I like to video many of my eMTB and motorcycle rides to share with others. This way people can see what the trails are really like before they ride them. I organize playlists around both rides and by locations/trails on my YouTube channel @jimroal (https://youtube.com/@JimRoal ).
I bought a Garmin Virb Ultra 30 back in 2017 and I use that for recording in-car videos. It is great and has GPS and accelerometers in it so I can get lap times, speed, acceleration, etc. I still use that today for in car video. I tried using it for bicycling and it worked OK but had it's limitations. The smoothing has limits due to the lens size, sensor, etc. Also, this camera is obsolete and no longer supported.
I researched the latest action cameras that were available at the time (May 2023), watching many videos comparing them specially for bicycling and motorcycling type recording. I settled on the Insta360 X3 which was new at the time I bought mine (May 2023). I was a bit disappointed that the GPS was not built in at first but bought their GPS remote which solved that problem. I used it on both the bicycle and the motorcycle and found the smoothing to be excellent, magical in fact. Some of my first videos were on my bicycle helmet which is of course the smoothest since we stabilize our head taking much of the roughness out already.
I also like the 360 pictures and videos as you can pan around while watching, or use in a VR headset. However, 360 video is very bitrate intensive so you need a very high-speed connection to watch it with decent resolution.
I found that for most videos I use the single lens mode which captures 4k video with smoothing very well. Here is an example using single lens mode mounted on a chest mount (using internal mic and no wind protection).
This remote captures the GPS data and the camera records it with the video similar to what my Garmin Virb did. Having the remote is also very handy. Note that the GPS and accelerometer data can only be overlayed on traditional flat video but that can be used when the video was shot in 360 but reframed to flat too.
Here is a 360 video mounted on the motorcycle where you can pan around while watching: https://www.youtube.com/watch?v=r-u0QMIwtO8 (note: the sound is just via the camera mics with no wind protection). I recommend opening these in YouTube versus viewing in that tiny window.
360 video where you can pan around while watching
Here is a video with the data in it and the latest mic setup.
The photo below shows the whole system on the motorcycle. The remote is strapped to the left mirror mount where I can easily reach it to start/stop recording while riding. I have a USB port on the bike so I can power the camera so I don't have to be limited by camera battery power. You can see the mic, covered by fuzzy wind muffs on the back of the bag.
I use a RAM Mount to mount the camera to my windshield bracket. I lower the windshield way down when riding off-road so the camera is taller and is not obstructed by the windshield.
One rather significant issue I still struggle with is in single lens mode the camera has automatic orientation. Motion side to side of the motorcycle really messes with this when you start the video recording. It sometimes will record the video sideways or even upside down. There is no way to force orientation in the camera. The video editing software does not let you correct the orientation either. I have requested both if these changes from Insta360 so maybe at least one of these features will be added at some point. My fix for now is to always start the video when still and the camera vertical. Sometimes this is not idea though.
This camera is one of the few that can create Google Street View as well, which shows up on Google Maps. I have used this feature, but it is glitchy. Many of the videos will get rejected by Street View due to various GPS data errors. Here are some of my Street View contributions that are active.
I did report these issues to Insta360 and they have been working to correct them.
The Insta360 X3 also shoots great spherical photos at 72MP. You have to use a compatible viewer, which more are finally supporting. Here is an example: https://photos.app.goo.gl/riUtLR61SLxNrojL9
The above view is likely still just a flattened image which just looks weird. Facebook supports them well now. If you open the Google Photos like above it should also view correctly where you can pan around. In Google Photos it initially shows the flattened image but if you click on it you can then view it properly.
The Insta360 X3 has many other great features. Now Insta360 has released their X4 camera which is the next generation after the X3, bringing higher bitrate support, which enables 8k spherical recording. It also has a larger battery and better lens guards, as well as a few other upgrades.
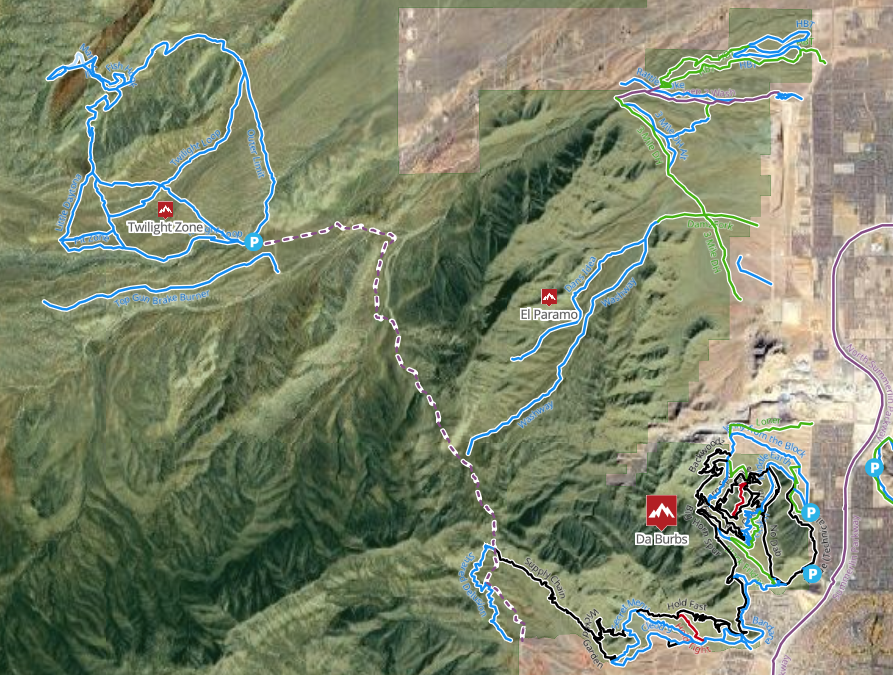
La Madre Foothills is an area in the Northwest of the Las Vegas valley. This area is managed by the Bureau of Land Management (BLM) and is part of the Red Rock Canyon National Conservation Area. The BLM recently completed a study and plan for this area that is documented here: https://eplanning.blm.gov/eplanning-ui/project/2031812/510 . While the plan closes many current trails, it also leaves several open, including some trails for motorized use. I have ridden my bicycles in this area for years.
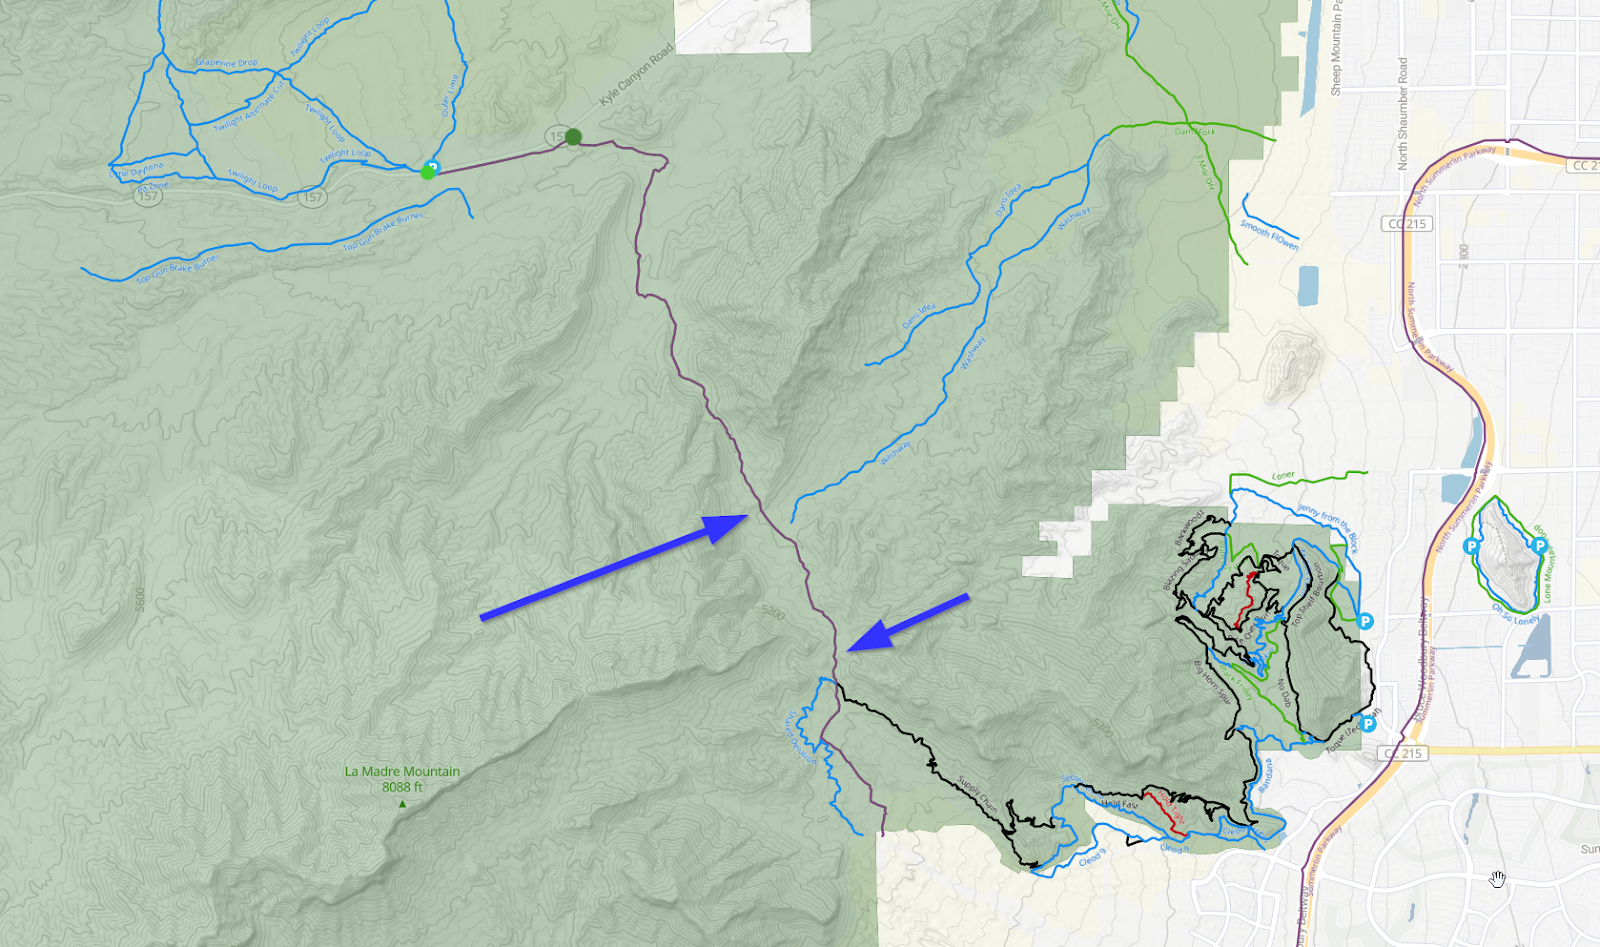
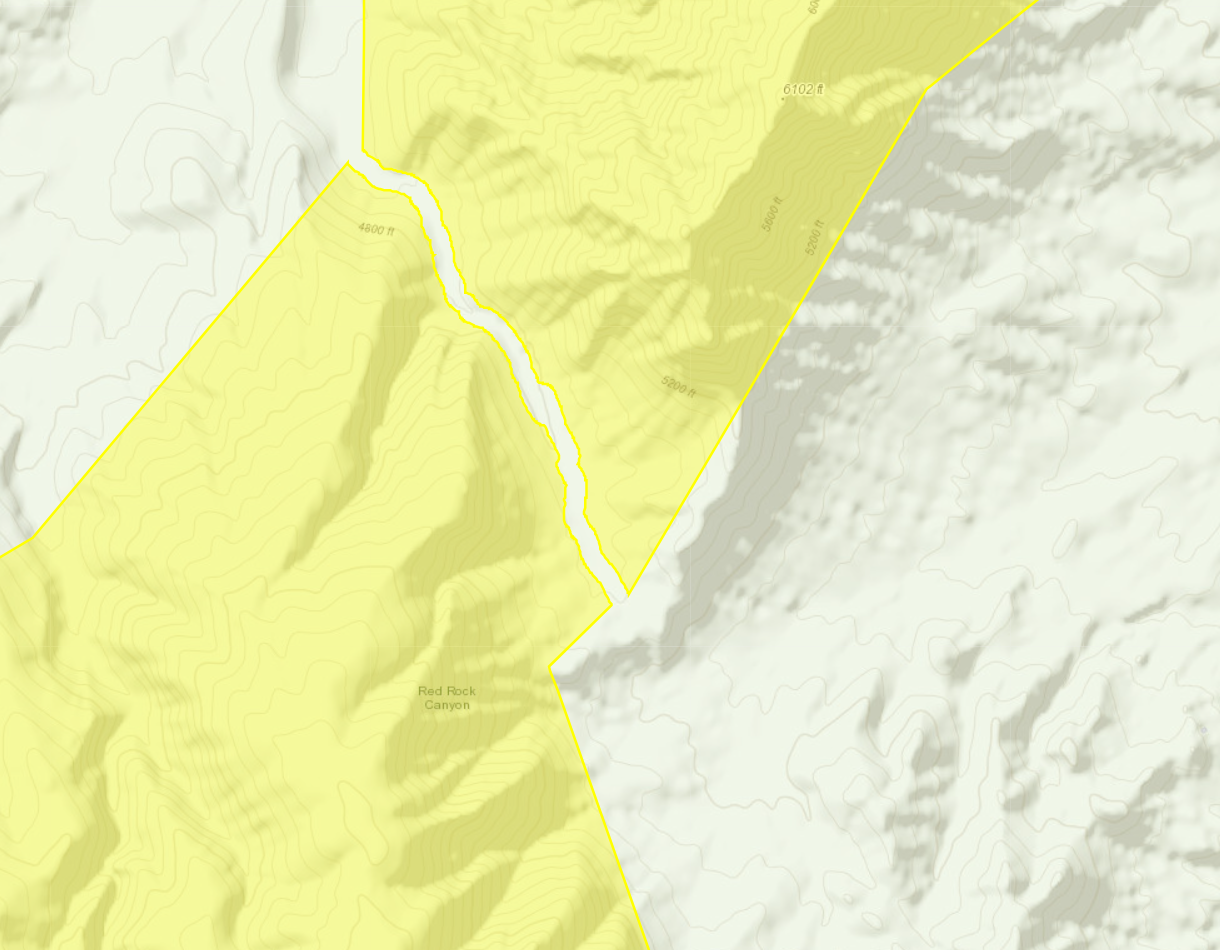
Here is a link to the map above in the Wilderness Connect mapping system. Part of this area is designated wilderness which means it is closed to all forms of "mechanized travel". However, many areas are not wilderness and are covered in the BLM Alternative B plan described above. Numerous existing 2-track trails have been designated for closure (shown in grey). The 2-track known as "Burro Road" in TrailFolks actually passes though both BLM land, and between a narrow corridor in the
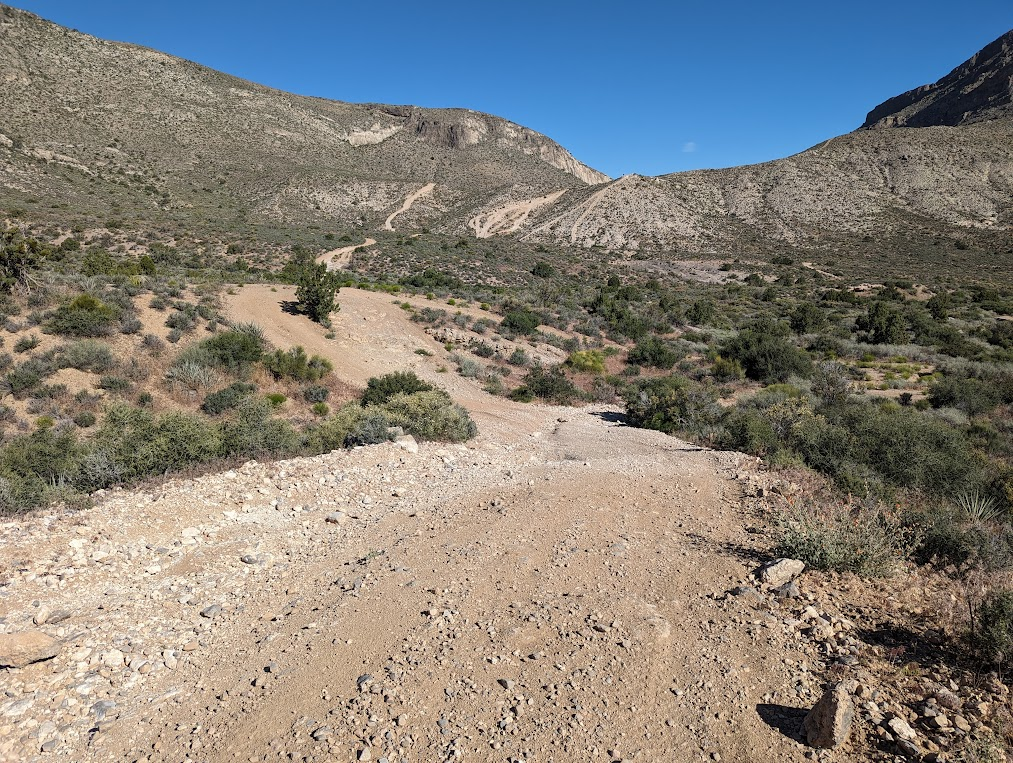
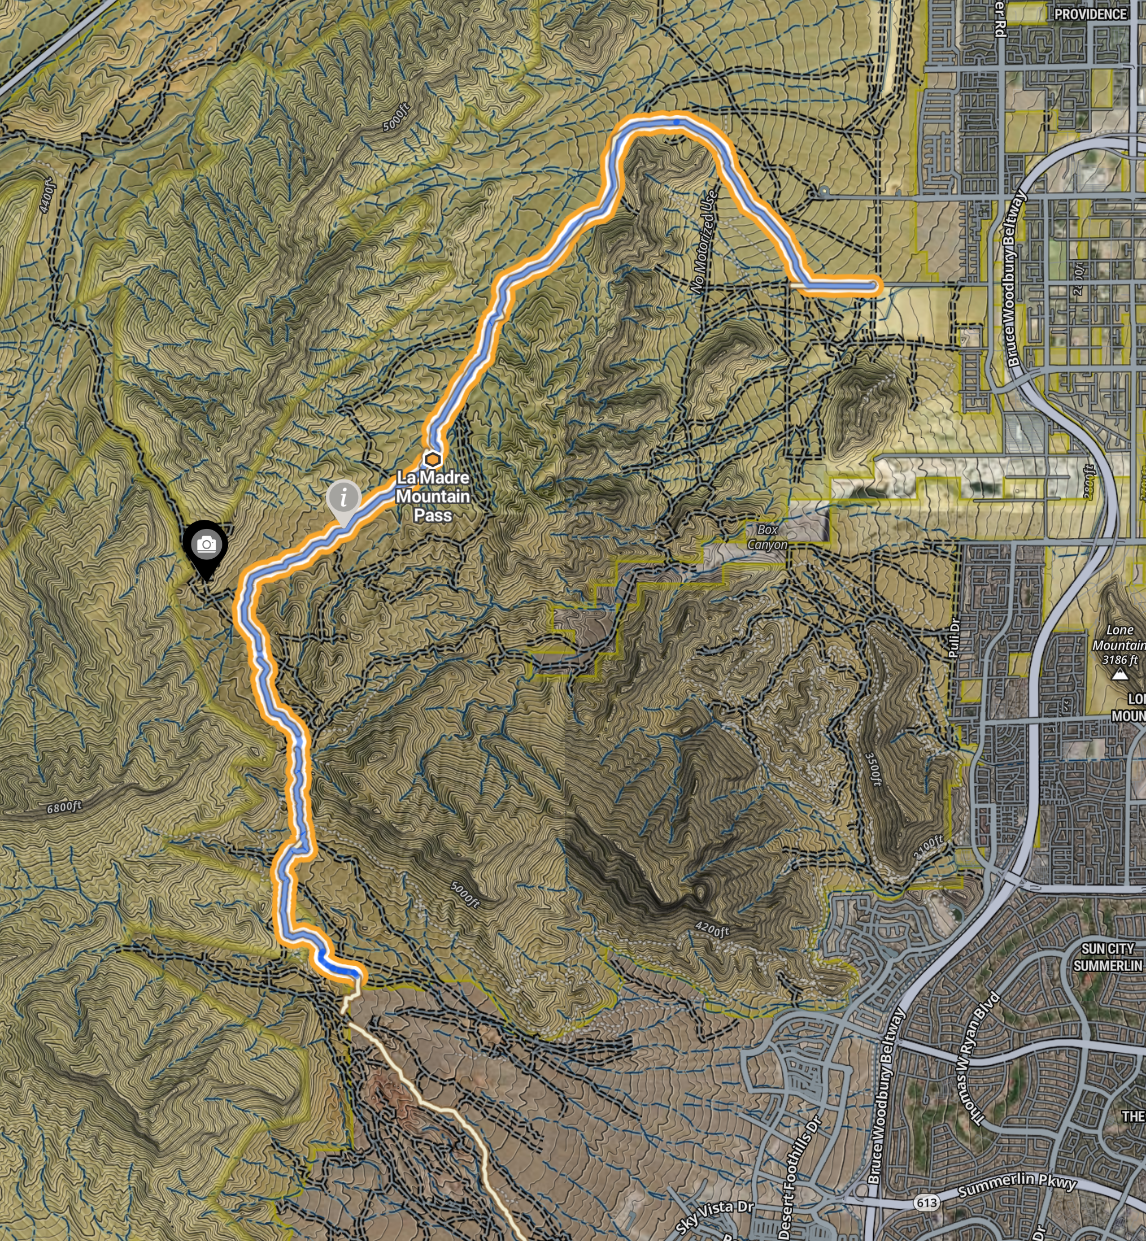
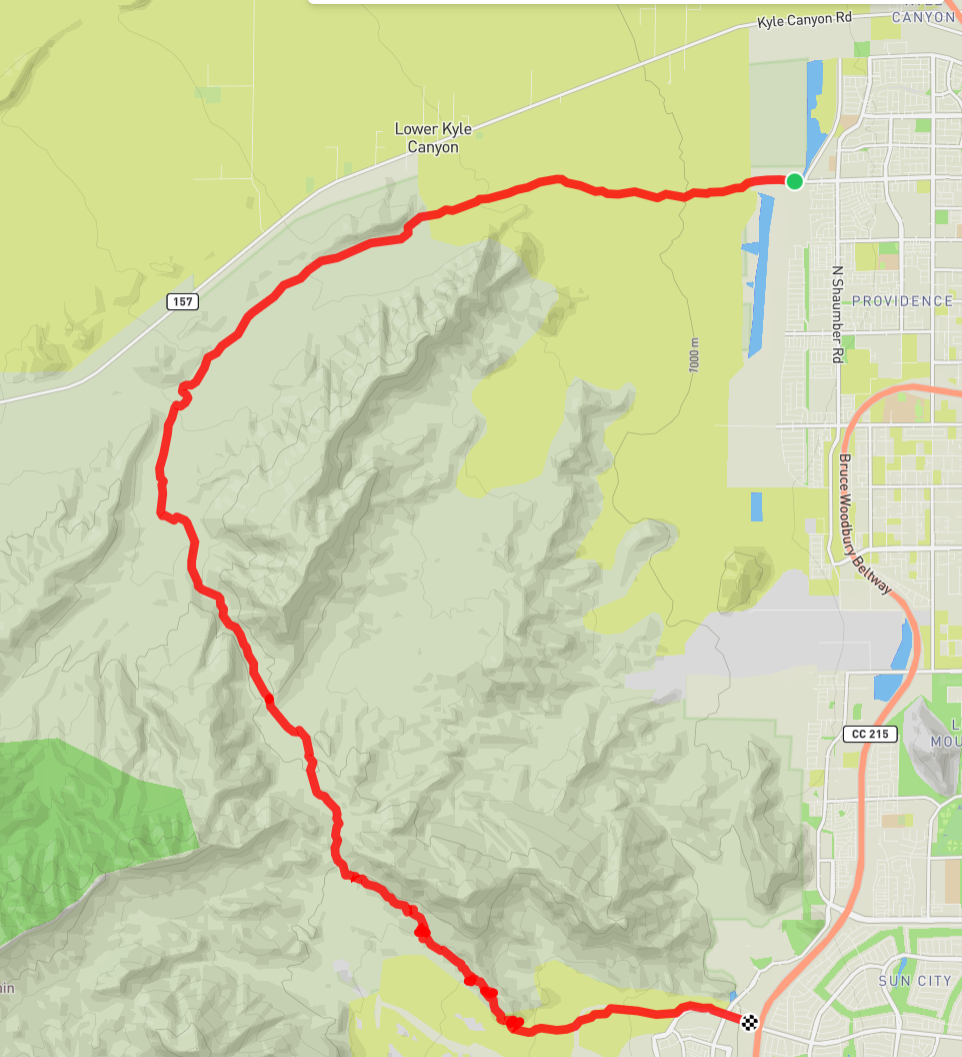
Others have called this same 2-track "Bad Words". This 2-track connects Little Red Rock to Harris Springs Canyon and eventually Kyle Canyon at the Twilight Zone parking lot. Traveling from Little Red Rock you will encounter 2 challenging hill climbs shown by the blue arrows below.
Here is a shot of the first hill (lower blue arrow above, photo below).
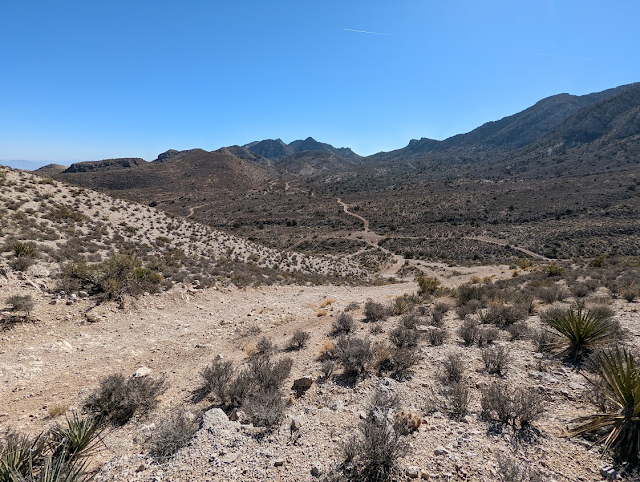
Below is the West hill which borders on the BLM property on the West side.
After climbing that hill in the background (photo above), there is a narrow wash that is a corridor between La Madre wilderness that is not designated wilderness (image below).
You can also connect between these 2 climbs by taking the trail Trailfolks calls "Washaway": https://www.trailforks.com/trails/washwaywhich can be accessed from the West end of Centennial or Tropical.
From the Kyle Canyon side, heading East there is a wash that leads to the top of the West pass.
Below is a shot from the West pass looking East towards Las Vegas (although you can't see Las Vegas since the mountains block it). The picture does not do a good job of showing how steep and high this hill is.
Here is a picture of the same hill from the bottom (looking West).
Below is a picture looking down the East pass towards Little Red Rock. This is the challenging hill which is steep and rocky.
The picture below is the same hill looking Northwest from below this same section.
I have now ridden over 1,000 miles on this bike, the vast majority off-road. Since my last update, I replaced the chain at about 900 miles. It was worn out already. Not surprising given the forces it has to take on this bike. I am not easy on it. The places I ride have large elevation changes, steep rocky hills, and loamy sand and gravel. I often gain 2,000ft or more in elevation. Long uphill climbs and then basically coasting back powered by gravity. The fat tires and full suspension are both hard requirements. I use the full suspension travel very often.
I often go multiple rides between battery charges. I keep both batteries on the bike and both used at all times to help extend the battery life. This way the discharge rates are easier on both batteries. I never worry about range at all. My longest hardest ride uses less than 50% of my total battery capacity. The range extender battery weights about 10lbs but on a bike this heavy I don't really notice it. With the motor power the weight is not a big deal. I get about 70 hard off-road miles at about 50% battery consumption. A typical 20 mile off-road ride takes about 2 hours. The batteries will last much longer than I will.
Here is a video of some of the terrain I ride in.
It shows crossing several loamy washes and some of the rocky segments and ends with a fun downhill segment. I have many more videos on my YouTube channel: https://www.youtube.com/@JimRoal
I am becoming a better rider. Some of that is actually due to me getting back into motorcycles. I bought a Husqvarna 701 Enduro last fall. This is the first motorcycle I have owned in over 25 years, and it is the heaviest and most powerful too. Riding this in loamy areas and other off-road challenges has made me a much better and more confident rider on the mountain bike. The ways you control the heavy motorcycle also work on the much lighter mountain bike. My mountain bike weighs 90lbs which is very heavy by mountain bike standards, but a feather compared to the motorcycle which weighs over 350lbs.
I enjoy mountain biking off-road and often in areas with no cellular. Sometimes I ride in areas with many established trails that cross each other and navigation would help. I looked into bike navigation but they have small screens, are costly, and many of the features are redundant with my Garmin fenix 6x Pro Solar watch. I also never trade in my old smartphones so I have several fairly recent ones laying around. I decided to use my old Motorola Z4 smartphone as a biking navigation using. First I needed a real robust mount. I started on Amazon and found this one.
It grabs all 4 corners and locks in place.
I cleared and reset the phone, removing all unnecessary apps to minimize battery consumption. I also put it in airplane mode, and keep WiFi and Bluetooth off to save power. The Moto Z4 I am using also supports MotoMod batteries, of which I have a few. I am using the 2200mAh unit primarily and I can hot swap in others if it gets low on the trail (which is unlikely). I could also connect the phone to the USB port in the bike display to keep it charged if I wanted. I removed the SIM card as well so it would not search for cellular even out of airplane mode. Then I installed Google Maps, Trailforks, Garmin Explore, and GAIA maps. All of these offer offline maps of bike trails. There are many others too. So far I found GAIA to be the best for bike navigation as it can ever store satellite maps offline.
Here is how I organized the home screen.
Here is what GAIA maps looks like.
Here is a video showing the use of this riding some trails.
This first ride was on a pretty easy trail. I have yet to test it on harsher rides but so far it seems solid. I am of course by no means the first person to do this. I wanted to use an old phone, and not my current phone, just in case that mount breaks or I crash the bike. Also, I didn't want to drain the battery on the phone I use normally since I want to be able to make calls, or message through my Garmin satellite messenger in case of trouble.
I now have over 350 miles on this bike, most of that off-road. This bike has been great for my riding style. I have the optional range extender battery which allows me to ride about 75 miles off-road on a charge. My riding includes many long hills and loamy conditions that burn through power too.
I have had some creaking noises which sound like they are coming from the handlebar area and possible the motor area. I checked and rechecked everything and all is tight.
When I bought this bike they offered several upgrades. One of which was a $300 Wren hub upgrade. I passed on it thinking why would I need that? Well, I found out why. I was up at Little Red Rock on a loamy hill. I hit the throttle and heard a snap and then the cassette just spun, no longer driving the wheel.
Luckily I was up hill so I was able to coast down to a main road and get picked up. I got home and took the hub apart and sure enough the ratchet teeth had sheared the ends off.
Now I decided to get the upgraded hub.
If you have an electric mountain bike with a high torque motor like this Bafang Ultra M620, best to also get a hub that can support it.
This bike is heavy but I used to ride dirt bikes back in the day so I don't mind the weight. The bike alone (no batteries) is 72lbs according to Biktrix. The main battery weighs 10.3lbs and the range extender weighs 7.6lbs. Total weight is about 90lbs.
Here is a video that shows the use of the throttle for some steeper or loamier bits in the beginning of the video. Watch for my left thumb applying motor power (throttle). Starting around the 5 minute mark, I begin the downhill portion that shows the suspension soaking up the terrain at around 20mph.
This next video shows a steep but short hill when I use the throttle to climb at about 25s in.
I like to ride my mountain bike up in the mountains. Sometimes I am in canyons between mountains where there is no cellular reception. I decided I needed a satellite messenger so I could always communicate, and for safety. I already have a Garmin fenix 6X Pro Solar watch, and a Virb Ultra 30 camera so I decided to stick with Garmin for this as well. As I was looking, they just introduced this InReach Messenger device so I bought one.
This device integrates with the Garmin ecosystem so the watch can trigger tracking and well as SOS and other features. This device also pairs with my smartphone so I can use the smartphone UI to create, send, read messages and other functions. Using the smartphone is very handy as it has a nice big screen and I am very used to interacting with it versus learning a new UI that is far smaller. The device uses a Messenger app to connect and interact with the device. The device can be used stand-alone though which is great. If for some reason I did not have my phone I could still communicate.
I had read some reviews about this device as it was just coming out. One of the pro's was great battery life. I have found the battery life to be stellar actually. I am writing this article in April and I have not charged it since last year. It is still over 70%. I use the device about 3 hours a weekend most weekends, year round.
Messaging is pretty simple and it can automatically switch between WiFi, Cellular, and Satellite as needed to minimize satellite charges. I have never used all my messages in a month. It also sends my location every 10 minutes so my family can see where I am regardless of cellular connection. This is great for safety.
Overall I would highly recommend this device for people who like to go places where there is no cellular.
I enjoy real off-road mountain bike riding in places where full suspension is a must and fat tires are needed to get through the soft loam. Much of my riding includes long steep hills, some in loamy terrain. I often ride Jeep trails as well as dedicated bike trails.
I started with a very inexpensive mountain bike with full suspension and 2-1/4" wire tires. The narrow tires would sink in to the gravel and sand I often encounter. Even on hard pack trails, the long steep climbs were exhausting. I realized I needed a fat tire bike with full suspension. Once you get that, you have a heavy bike so I decided to go electric as well (which of course add even more weight).
I have been riding my Rurui XT10 rear hub drive electric mountain bike over a year and over 1,100 miles. In that time I failed 2 controllers due to overloading them on long steep hills. Since the motor must handle the wide speed range with no transmission, it is very poorly suited to low speed riding. On PAS 1 it would go about 12mph where assist would then taper off. Below about 10mph the motor was just turning too slow and was very inefficient. Electric motors may produce high torque at low speeds but they cannot sustain that very long. The long steep hills were too much for the hub drive system. The hub drive I have in this bike is geared which helps but it was not enough of a gear ratio for the riding I was doing. Freewheeling the bike would reach 39mph top motor speed. I never needed to motor to 39mph. 25mph would have been much more applicable to my riding. A hub drive with much high gear ratio could really help.
However, the other issue is how and when power is applied. The Rurui had what is called a "cadence" sensor which measures the crank speed. In reality it seemed to only measure if there was crank speed or not. If you were pedaling, it applied power assist based on your PAS level selected. It makes for a strange riding experience since the motor power applied is independent of your pedaling force. There is also a delay in reading pedaling speed (cadence) and applying power. If you wanted to ride slow through some technical bits, you really had to cut the motor power. I would often do this by just pulling a brake lever far enough to cut the motor. There are now hub-drive bikes that use torque sensors.
I think hub drives are a decent approach for road bikes or at least when riding on well developed hard trails with gentle slopes.
I analyzed many approaches to augmenting the Rurui to better suit my riding. I could add a front hub drive and I have seen some bike like that on the market. However many of the downsides would still exist, now with the added weight of another motor and a whole bunch of added complexity.
I could add a mid-drive. This would give the benefit of mid-drive but also keep the hub drive. It could more than double my power. I could switch between as needed or use both. Again, weight and complexity were concerns. Another big concern was how low the add-on mid drive systems hang. I already had problems smashing my pedals on rocks I did not want to smash a motor.
It was time to just upgrade the bike. I needed a powerful mid-drive bike with more speeds to handle tougher off-road situations. I needed to be able to crawl along at lower speeds through the technical stuff. I needed to be able to climb much steeper and longer off-road hills. I needed better suspension to keep the pedals out of the rocks. I needed a drive system that would work better at low speeds and higher loads for long periods. I wanted less un-spring mass on the bike for improved suspension performance. After many months of research, I decided on the Biktrix Juggernaut Ultra FS Pro 3.
The differenced was stark and immediate. The very first thing I noticed was the power delivery. It is pretty much immediate assist when you start pedaling. I can start off up a fairly steep hill with no problem. It is like having bionic legs. Since it is sensing the pedaling force to apply power, the response of very controlled and natural. Here are some video clips from my first off-road ride on the bike.
I have ridden this route before on the Rurui several times. I normally have to get off and push the bike up the steep parts. Not on the Biktrix. I did push through a few very steep technical bits but that was not because the bike could not climb it. This ride was a breeze on the Biktrix.
The mid-drive system takes advantage of the narrower pedal cadence speeds versus wheel speeds. The motor is geared to apply much more torque since it does not have to deal with very high pedal speeds. It takes advantage of the bike gears to support a wide range of bike speeds.
As with everything, there are of course some trade-offs. When shifting gears motor power is interrupted to protect the gears from damage. As with a non-electric bike, when shifting you should reduce pedal force until the sift is complete. This of course does interrupt power delivery for a second. Another trade-off is that this total power from pedaling plus the motor power now goes through your chain and gears. This will be very hard on them. Even if I have to change the chain, chainring, and cassette every year it will be totally worth it.
If you enjoy real off-road riding, the mid drive with many speeds (11 in my case) and wide speed changes (42t-11t) is the way to go. Hub drive could be fine in flatter and hard-packed terrain where you plan to be at speeds greater than 10mph at all times.
I bought this bake based on my experiences with prior bikes given where I like to ride. I go off-road much more than on pavement. I put 1,200 miles on my Rurui XT10 and learned many things about the pros and cons of hub drive electric mountain bikes. I realized that for my riding I needed a powerful mid-drive bike so after shopping around, I bough this.
The power delivery from this bike is much better suited to my riding. It uses both crank torque and cadence sensors to determine how much motor power to add. This is a much more controlled and natural way to add assist power. It also takes advantage of all the gears, 11 on this bike, to provide high torque and a wide speed range. The mid-drive is also all suspended weight which gives better suspension dynamics in rough terrain.
It arrived in a box very similar to my Rurui bike did.
Like the Rurui, I had it assembled in about 30 minutes. Pretty easy.
I took a couple short rides around the neighborhood and adjusted it to get everything working well and the best ergonomic feel.
My first off-road ride was out to a trail I had been building, less than 8 mile round trip. Later that same day, I took it for a 23 mile loop which included paved bike path, long steep hills, loamy washes, rocky hard-pack, and everything else the desert has. I had ridden most of this route before on the Rurui so this was a great ride to contrast them. This bike is so much better suited to off-road riding. With 11 speeds and the mid-drive, it can climb any hill with ease. I shot a YouTube video with some clips from that ride.
I don't even have the range extended battery installed yet but so far the battery life is fantastic. Surely this is at least partly due to the mid-drive motor being in a much more efficient operating range, especially in the off-road situations that require high power such as steep hills and loamy terrain. The hub drive was just turning too slow and to close to stall where it become very inefficient and is hard on the controller too. The mid-drive has a much narrower operating speed since it is based on crank speed and takes advantage of the gears to handle a wide wheel speed range.
The Biktrix has a better suspension too. It has air suspension front and rear. The front rake has more angle which makes the wheelbase a bit longer, making the bike more stable at higher speeds. This also angles the wheel more when turning.